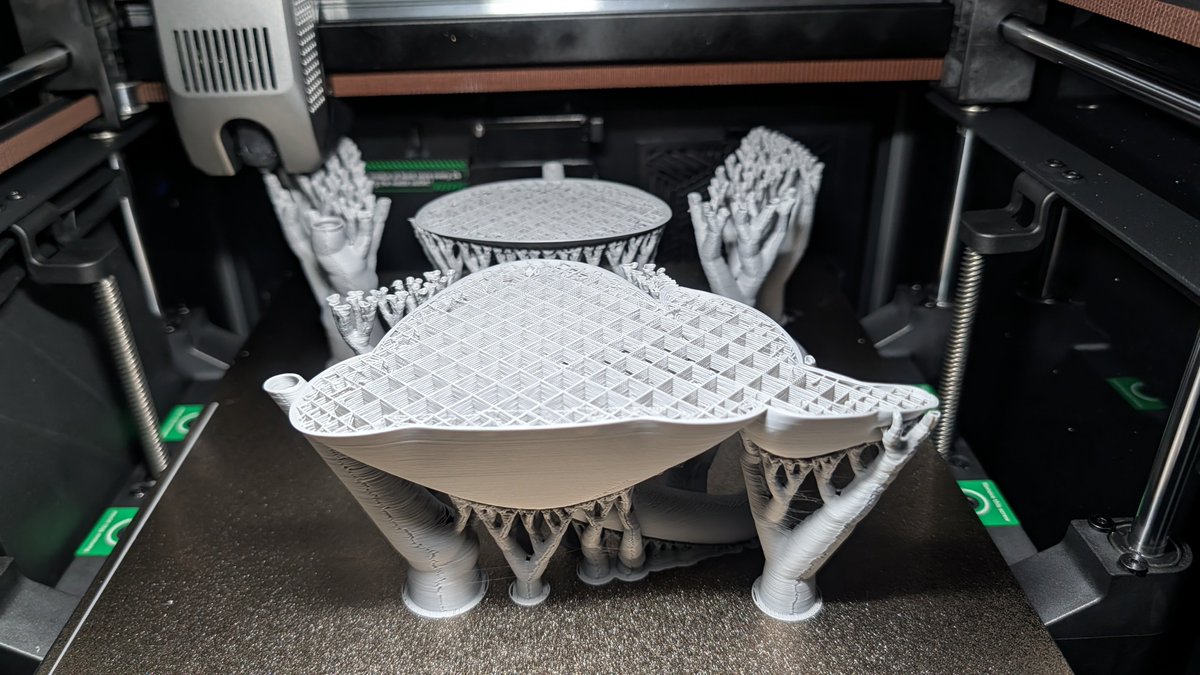
Nothing beats a perfect press fit! Designed this custom adapter to bridge the gap between my Creality K2 and hardware store pipes to keep the waste under control. No glue, no screws, just tight tolerances and a very clean floor. The K2 poop 💩 finally has a direct flight to the bin!
#3DPrinting #3DPrinter #Maker #DIY #CrealityK2 #CrealityK2Plus #Creality #BambuLab #3DPrintHacks #WorkshopOrganization #FunctionalPrinting #Printables
@Creality3dP
@reprinted3D Absolutely. The only difference, when I look at my original STTNG phaser in my vitrine is the colour. Changing that to a light blue and you got it 😁
I wonder if it also has these cool sound effects 🤔
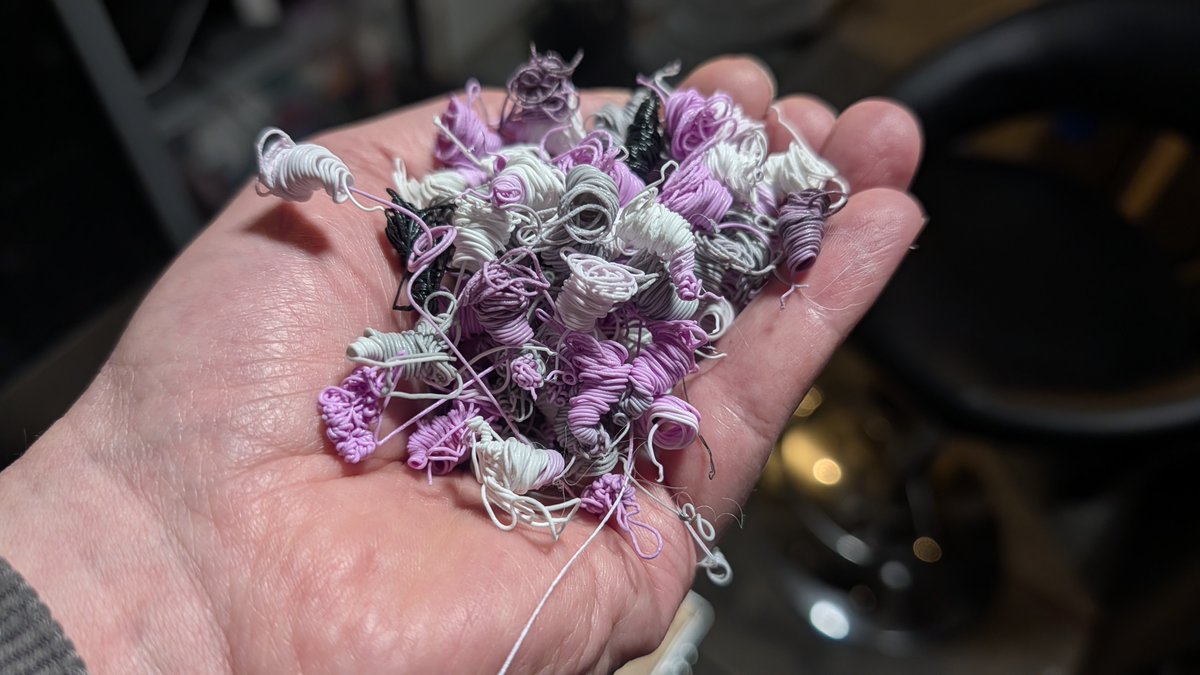
When printing with systems using a colour changing mechanism like the CFS (AMS, MMU etc) the majority of the print time will be spent on colour swaps. The CFS needs between 2:30 - 3:00 minutes for a change (cutting, retracting, feeding, purging).
For a colour swap on average 2 of the purge poops are produced, depending on the difference between the colours it can vary between 1 and 3 but most times two.
The chamber temperature is not affected by it. On the K2 Combo you have only passive heating but in case the desired temperature gets higher it uses the case fan to keep it stable.
In case you need better control over the chamber temperature check out the K2 Pro, or Plus which both have an actively heated build chamber, and also even bigger build volumes of 300 mm^3 / 350 mm^3.
The hotend keeps the temperature stable at high speeds, too, due to its long heating zone and the compact ceramic heater that quickly reacts on temperature drops.
I hope that answers your questions?
I’ve spent the last week with a multi-material budget friendly flagship that everyone’s been eyeing. There’s a lot of talk about "pro-level" features, but I wanted to see how the hardware actually handles high-speed flow and filament swaps in a real-world enclosure.
Is this the compact powerhouse we’ve been waiting for, or are there hidden trade-offs in the assembly?
@AndrewASink@3dprintingnerd I tried to do the Joel high-five once, but I missed the camera and accidentally knocked over a half-finished Benchy. The similarities end there. 😂
@MrPewpyButWhole Wow. I'm truly honored that you're putting me on the same level as Joel. Thank you so much—it really motivates me to keep going!
@joeltelling
New machine. New ecosystem. New headaches? 🧐
I’m breaking down a "Combo" unit to hit the market. It promises a seamless multi-material workflow, but does the mechanical execution live up to the hype?
I’m sharing the data on print speeds and surface finish today at 5pm. You might be surprised by where this machine actually fits in your workshop.
I love printing at crazy speeds, as long as the quality doesn't suffer too much.
In this case I don't care because it's a functional part. It just needs to be good enough for it's job without winning a beauty contest 😁
The "Poop" goes on. Somehow my provisional poop collection bin didn't stay in position, leading to get my floor covered with a lot of filament poop 💩.
Luckily the long print I started two days ago finished successfully after 28 hours and 15 minutes 😊
Thanks to everyone who kept the fingers crossed 🤞
That print will be revealed in my next video I'm currently working on.
In the meantime watch my other videos on my YouTube channel (link in my profile 😉)
When you think there's no way to get Klipper Firmware for your 3D printer because there's no config for it yet then my recent YouTube video may come right.
It describes how to get all the information required to build a printer.cfg from scratch!
It covers all of the following (check out my YouTube channel to watch it):
- Missing Klipper Config and Why It Matters
- Searching the Official Klipper Config Repository
- Hardware Detective Mode Begins
- Identifying the Printer Mainboard
- Finding Pinouts Inside Marlin Source Code
- Manual Pinout Tracing Strategy Explained
- Using AI to Identify Bootloader Offsets
- Visual PCB Tracing with High Resolution Photos
- Tracing Endstops Using a Multimeter
- Identifying Stepper Driver Pin Connections
- Tracing MOSFETs for Heaters and Fans
- Compiling and Flashing Custom Klipper Firmware
- Building printer.cfg Completely From Scratch
- Finding the MCU Serial ID Using lsusb
- Fixing Klipper Connection Failures
- Critical Safety Check Testing Thermistors
- Heater Testing and Fire Prevention
- Stepper Motor Verification Buzz Test and Direction
- Final Calibration PID Tuning and Rotation Distance
- Conclusion and Next Steps
https://t.co/tEoxLyt6ad