@ByZakilakbir Hi Zaki. I have experience editing short-form talking-head content for video marketing agencies and YouTube channels. Here is my portfolio: https://t.co/LUQhn7lbu4
If you are reviewing editors, I would like to chat
@Jerrys_Takes Hi Jerry. I have experience editing talking head content for video marketing agencies and YouTube channels
Here is my portfolio: https://t.co/LUQhn7lbu4
If you are still reviewing editors, I would like to chat
@WoodsfordShea Hi Shea. I have experience editing talking head content for video marketing agencies and YouTube channels
Here is my portfolio: https://t.co/LUQhn7lbu4
If you are reviewing editors, I would like to chat
@ALeaked17988 Hey Josh. I have experience editing talking head content for video marketing agencies and YouTube channels.
Here is my portfolio: https://t.co/sbuqKRZOgM
If you are reviewing editors, I would like to chat
@ugcwithgeorge Hi George. I have experience editing talking head content for video marketing agencies and YouTube channels
Here is my portfolio: https://t.co/sbuqKRZgre
If you are still reviewing editors, I would like to chat
TL;DR
1) Create a Master Project for each regular client.
2) Add your reusable assets into organized bins.
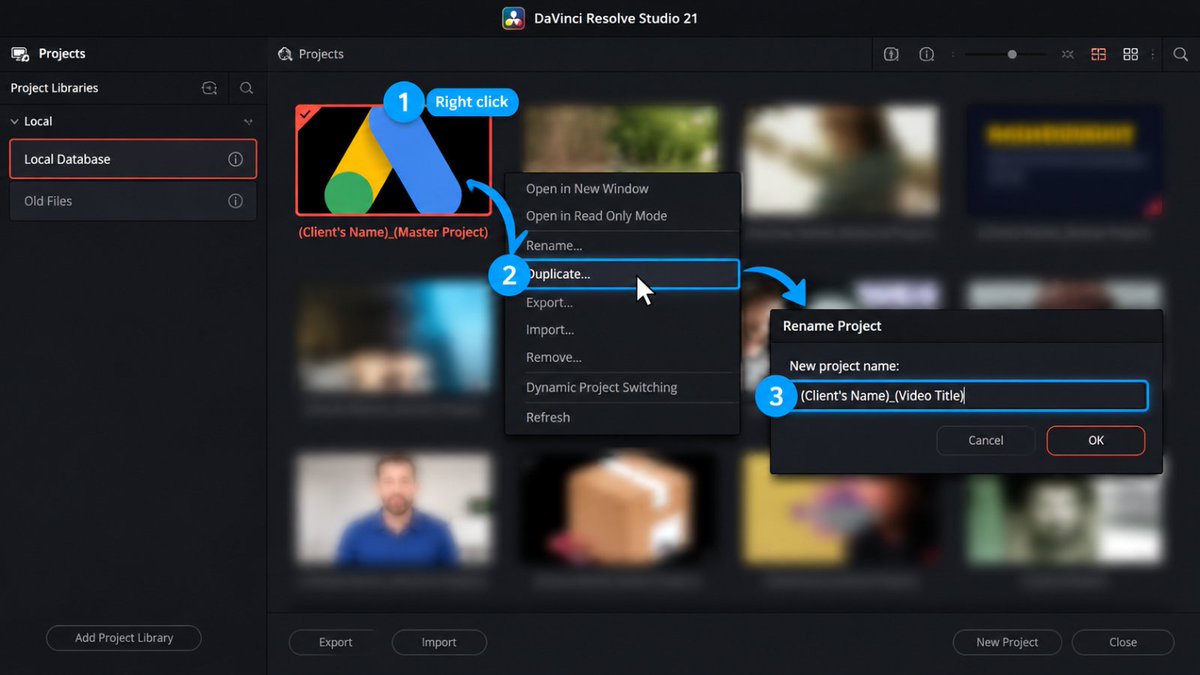
3) Duplicate the Master Project for every new video, rename it, and start editing.
This keeps your workflow organized, consistent, and faster without rebuilding the same setup every time.
Follow me for more ❤️
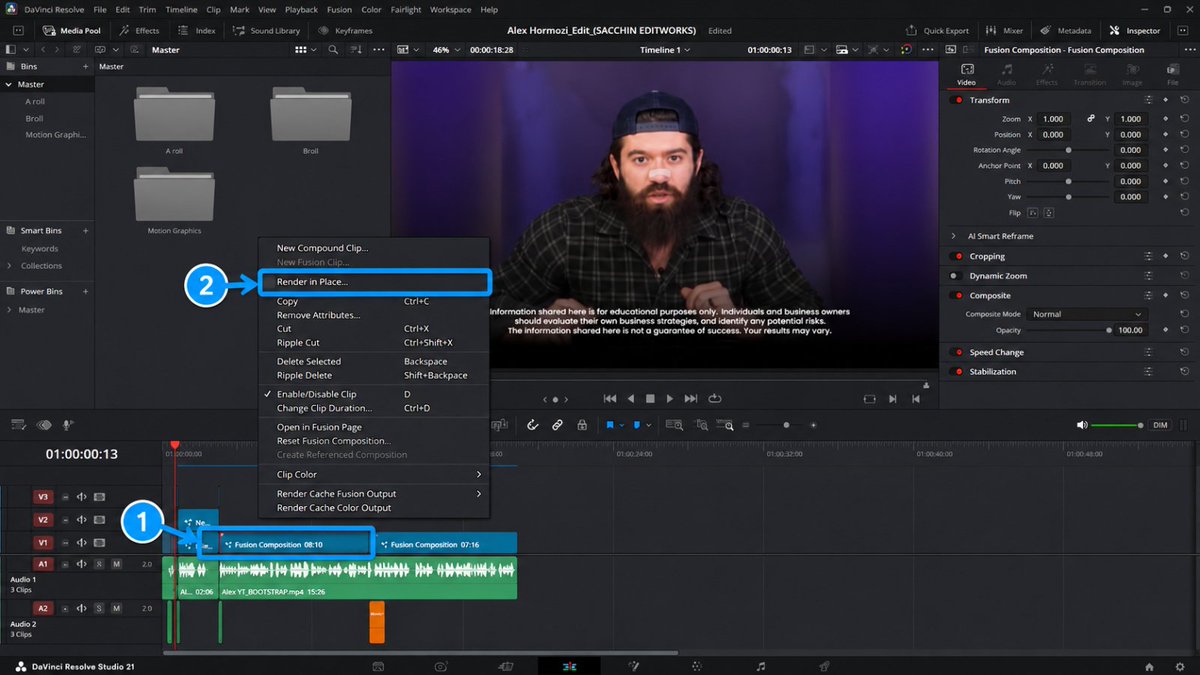
3. Render Heavy Motion Graphics
For heavy Fusion compositions, right-click the Fusion clip → Render in Place.
This renders the composition so Resolve doesn’t have to process it in real time during playback.
Pro Tip: Save the rendered files inside your project's Edit Files folder. This keeps your project organized and makes managing storage much easier.
For consistent clients, I have a separate project file with all of their reusable assets. When I’m about to edit new content for them, I just duplicate that project file, rename it, and start working. This keeps client-specific animations, text styles, chapter titles, etc. separate from my generic assets.
Number 3: Adjustment Clips
Instead of adding the same effects or adjustments to multiple clips individually, use an Adjustment Clip.
Place it above your clips and add your effects, color adjustments, transforms, or other changes to it. Everything underneath will be affected.
And the best part? Press D to quickly disable the Adjustment Clip and compare the before and after without turning off each effect individually.
Number 2: Power Bins
Have an animation, caption style, or asset you want to reuse across projects?
Save it in a Power Bin.
Here’s how:
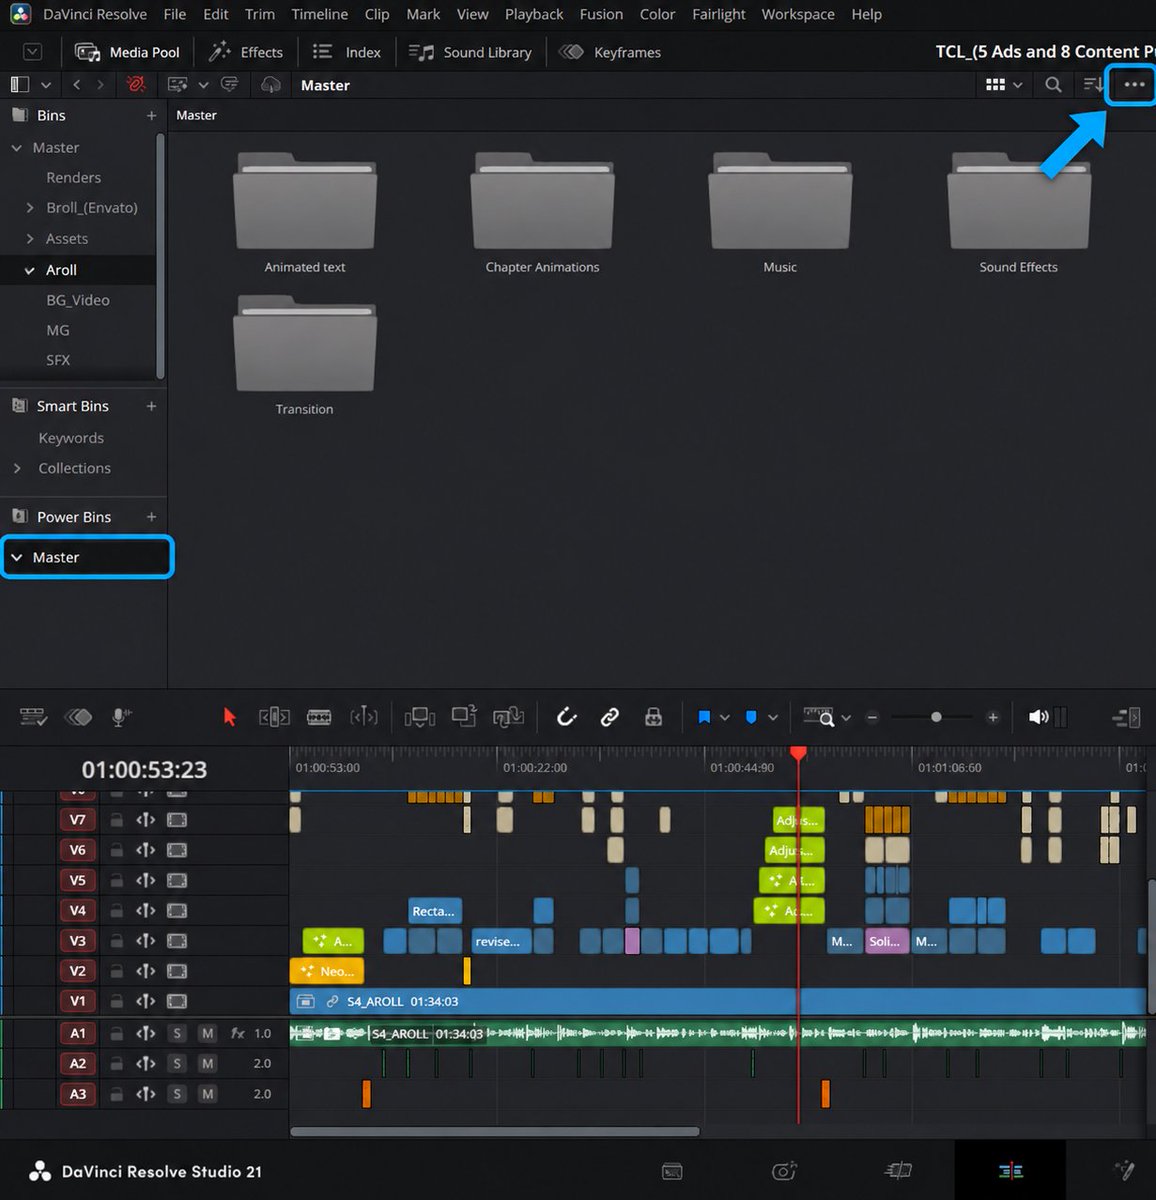
1. Click the three dots in the Media Pool, then go to "Show Power Bins:
2. Click Master at the bottom left
3. Press Ctrl + Shift + N (on Windows) to create and name your Power Bin
4. Drag your reusable assets into it.
Now you can access them from any project without switching between projects.