UniswapV3: How does slippage protection works..?
In UniswapV2, we simply have to pass in the minimum amount of tokens we want to get out of a swap.
If the output is less than what we specified, slippage protection kicks in and the tx reverts.
But in V3, instead of amountIn or amountOut, we pass the price we want the swap to lead to, so how does slippage protection works?
Well, when we pass the price the swap leads to, that actually functions as our slippage protection!
Because the loop in the swap function will exit if we ever hit that price, so we accomplish two things:
- we use the price limit to determine the amount we put in and the amount we take out
- we terminate the swap if we reach the slippage price.
Here is how this looks in code:
So, for USDC/ETH pool, consider these two scenarios:
Swapping ETH for usdc( Price Decreasing)
Eth becoming less valiable. Price at our slippage should be GREATER THAN all the prices coming after it, since the price is decreasing. This is why we take the maximum between nextPrice and limitPrice
Swapping USDC for ETH ( Price Increasing)
Eth becoming more valiable. Price at our slippage should be LESS THAN all prices coming after it, since price is increasing. This is why we take the minimum between nextPrice and limitPrice.
Let me know if you have any questions!
Over the past week, Celsius has transferred more than $125 million worth of ETH to exchanges, including approximately $95.5 million worth of ETH to Coinbase and $29.73 million worth of ETH to FalconX. Celsius currently has 539,000 ETH left, worth $1.38 billion. https://t.co/bvGxmOOFCO
UniswapV3: EVERYTHING you need to know about ticks. Part 1
I spent A LOT of time tracing and debugging so you don’t have to!
In this series, we will deep dive into how ticks work!
Our aim is to have a deep understanding of UniswapV3 core feature: cross tick swaps!
Lets get to it!
Imagine a bitmap of size 256, each bit can either be 0 or 1.
We'll call them words. We can have as many words as we need.
For any give tick, we can figure out the following:
- What word our tick belongs to.
- The bit position representation of the tick in the word - The value of the bit (1 or 0)
- The overall value of the word at hand
Here is what a word would look like:
For instance, consider the tick 81756
We can get its word and bit position by the following formulas:
- Word = (tick / 256 ) = (81756 / 256) = 332
- Bit Position = (tick % 256) = (81756 % 256) = 184
So, tick 81756, is located in word 332 and specifically in bit 184.
When we first add liquidity to any tick three things happen:
- We flip the bit that represents the tick from 0 to 1
- We update the value of the word. Which is initially 0, since all bits are set to 0.
- We update the tick's amount of liquidity ( more on that later )
Let's see what happens when we want to add liquidity to a two ticks.
Say 84222 and 86129, and assume that the liquidity amount is 5000.
So, here is our input:
- Upper Tick = 86129
- Lower Tick = 84222
- Liquidity = 5000
For tick 86129:
- Word = 336 ( 86129 / 256 )
- Bit position = 113 ( 86129 % 256 )
For tick 84222:
- Word = 328 ( 84222 % 256 )
- Bit position = 254 ( 84222 % 256 )
For tick 84222 the liquidity is 5000, which is kinda expected.
However, at tick 86129 the liquidity is -5000, now why is that?
When we cross from a lower tick to an initialized higher tick ( contains liquidity ), we remove the liquidity, thus the liquidity value is negative at the higher tick.
On the other hand, moving from higher ticks to lower tick adds liquidity, that is why the value is positive at the lower tick.
There is a slight variation to this but that's for the next post!
Let me know if you have any question!
Many new people are entering web3 development and security, so... here we have it!
🚨I have been studying various fields within web3 security and taking notes on everything and have compiled them in Notion during last year.
and now... I want to share it with you!!!
1. Follow me 👈🏼.
2. RT this tweet 👈🏼.
3. Comment on this tweet 👈🏼.
(Remember to keep your DM's open. I will be reaching to you in the upcoming days) 👇🏼
Flashloans were a very wild thing in 20/21. A lot of exploits were caused by flashloan opportunities, and back then, the term “flashloan” was scary. If you are a DeFi investor feeling the same way today as I felt back then, there's absolutely no reason for this. I will explain everything you should know about a flashloan:
Many protocols such as AAVE’s lending pool implement a flashloan function, which is callable by anyone and works as follows:
1. Call flashloan function
2. Receive tokens
3. Execute logic upon the callback
4. Repay tokens
This is the usual process. Let’s take a look at AAVE’s implementation:
As we can see, first the fee is determined, then the user will receive the tokens, then the callback is executed which allows for arbitrary operation and expects the user to transfer tokens + fee back. Afterwards the proper balance is checked.
On a sidenote, a few things as an auditor to check:
1. Bypassing of balance check.
2. Execute a deposit on the underlying protocol during the callback which increases the balance but grants user a deposit receipt.
3. Unupdated state of vault/pool, as example the amount which is transferred out is not reflected in a reserve deduction.
4. Potential abuse of the fee logic, achieve an abnormal increase of the fees such that another spot in the protocol can be abused.
Hope this helped some guys out there!
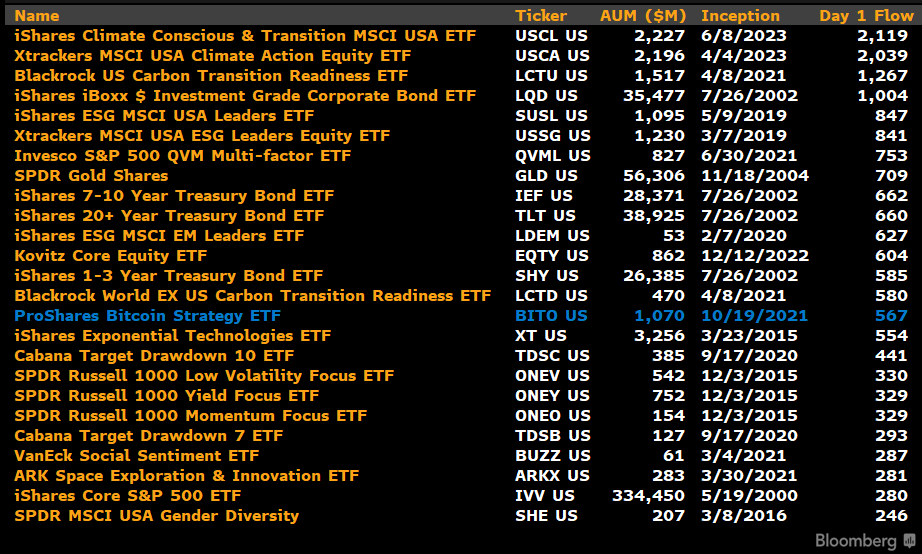
Who knows what will happen today, and we don't want to mess with our recent prediction win re approval but we watching to see if $IBIT will break all-time day one flow/volume record of $2.1b (curr held by another blk ETF) and if the 11 of them as gp can get near/over $4b.
Use ETH, buy stETH, wrap stEth to wstETH, use wstETH for yield farming.
Most people are following exactly the methodology, however, they are not aware of the technical background nor the potential smart contract risks.
I will quickly explain each step with the underlying smart contract representation.
First of all, we need ETH and then swap ETH to stETH (or of course simply depositing in the stETH contract), i think we can save this step as really nobody needs an explanation how a swap is happening, speaking of that, it might be valuable to dissect UniV3 swap in another post, let me know if you are interested in this in the comments.
Ok great, now since we have stETH, we know that this is a yield bearing token and our wallet balance will be increasing over time - but how is this possible?
Well, you simply receive a specific amount of shares upon your deposit or if you just buy the stETH:
and upon distribution of the staking rewards (ETH), your shares will be worth more and more, as your balance is reflecting:
Risks for the stETH token i saw while skimming the contract seems to be governance privileges like pausing and proxy upgradeability, but of course i'm not auditing this now.
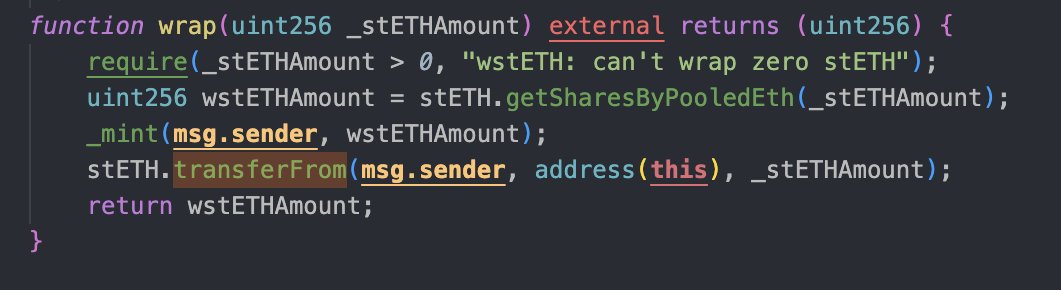
This also explains the rationale behind the wstETH token, as a dynamic balance will essentially brick most DeFi protocols, hence you just wrap it to wstETH to have a static balance but an increasing underlying value, sounds great? Let's check how this is done
how wonderful, it's a simple wrapper function using stETH’s trusted conversion rate which is increasing over time, hence you will get more tokens back than you have initially deposited, because simply of the increasing balance in the wstETH contract. Here you can see how much stETH is currently sitting in the wstETH contract:
Risk-wise, there is not any risk for the wstETH contract besides of the usage of stETH’s conversion rate (remember, the stETH is a proxy contract).
On a side-note, it would be worth taking a look at the exact methodology of how ETH, respectively yield, is paid back towards the stETH contract, as these things often allow for flash-thefting.
However, I'm 100% certain this will not be an issue here, as I guess there are not many protocols with as many audits as Lido.
But you feel the urge (@LidoFinance ), to get another audit, feel free to reach out to me ;)
PS: If anybody knows how/if I can nicely insert the pictures in the corresponding text, please let me know.
Most auditors are completely underestimating the power of remix during auditing, i am constantly using remix for my auditing purposes, as it helps me with the following things:
1. One can simply copy paste certain functions to inspect, review, and analyze their behavior to identify vulnerabilities, logical flaws, and other issues. A lot of bugs have been found by simply being curious. Specifically for very complex interactions like inline assembly, this is VERY helpful.
2. If you are not in the mood to setup a foundry environment or only want to check specific functions, try out dumb ideas or anything else, you can quickly check for compilation issues, though, that is nothing i am doing nowadays.
3. You can interact with deployed contracts.
!!! DON’T DO THIS TO TEST OUT LIVE VULNERABILITIES !!!
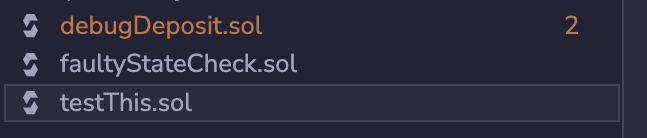
4. You can quickly debug certain flows, which often helps to assess specific mid-function states. Specifically for faulty state ideas this can be very helpful.
There will be so many opportunities in Web3 Security/Web3 space this year, just don't miss them!
That's why @ShieldifySec already works with nearly 10-13 Top Smart Contract Auditors in the Web3 Space
for Solidity, Vyper, Rust/Solana, Go and Cairo!
The most interesting and unique issue for transfer-tax tokens:
As we all know, most transfer-tax tokens implement a mechanism to auto-add liquidity and auto-swap tokens, during the internal _transfer.
Have you realized that these auto methods are not executed when the from address is the pair? For example, during a purchase transaction.
Well, there is a pretty cool explanation for this, let's consider the buy flow to understand it:
Buy Transaction in AMM Pairs:
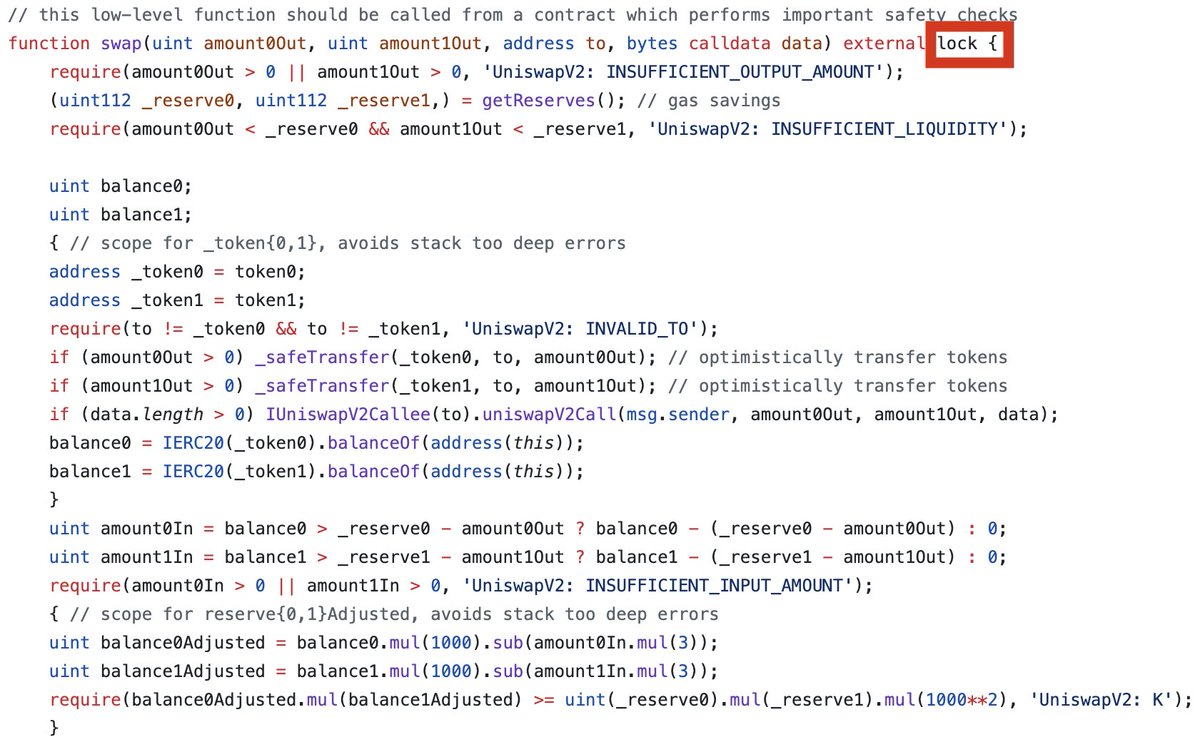
The transaction starts with a user sending a base token (like USDC) to the pair (lets call it TAX/USDC Pair). The .swap function in the pair is then triggered. This function, as part of its logic, optimistically transfers the TaxToken (or any other token involved in the swap) to the recipient.
If the TaxToken contract has an auto-swap or auto-liquidity feature implemented in its _transfer function, and this feature is triggered during the transfer to the recipient, it would attempt to interact with the pair again (to swap TaxToken for another token, like USDC, as part of adding liquidity or swapping for another purpose).
However, since the original .swap call from the pair is still in progress, the pair contract typically employs a lock mechanism for safety reasons. This is a critical security measure to prevent issues like reentrancy attacks.
As a result of this reentrancy protection, if the TaxToken's auto-swap feature attempts to call the pair's swap function again, it will be reverted due to the ongoing execution of the initial swap. This leads to a situation where neither the initial swap nor the auto-swap can complete successfully, causing the whole transaction to fail.
To avoid such issues, it's important to design the token contract in a way that it does not trigger auto-swap or auto-liquidity features when the token is being transferred as part of the pair's .swap execution, respectively just check if the from address is the pair. This is why the _transfer function in the contract likely checks if the from address is a market pair and, if so, avoids executing the auto-swap logic.
Comment if you would like me to do more such content 🧵
They said it couldn't be done.
They said inscriptions were useless.
Think again.
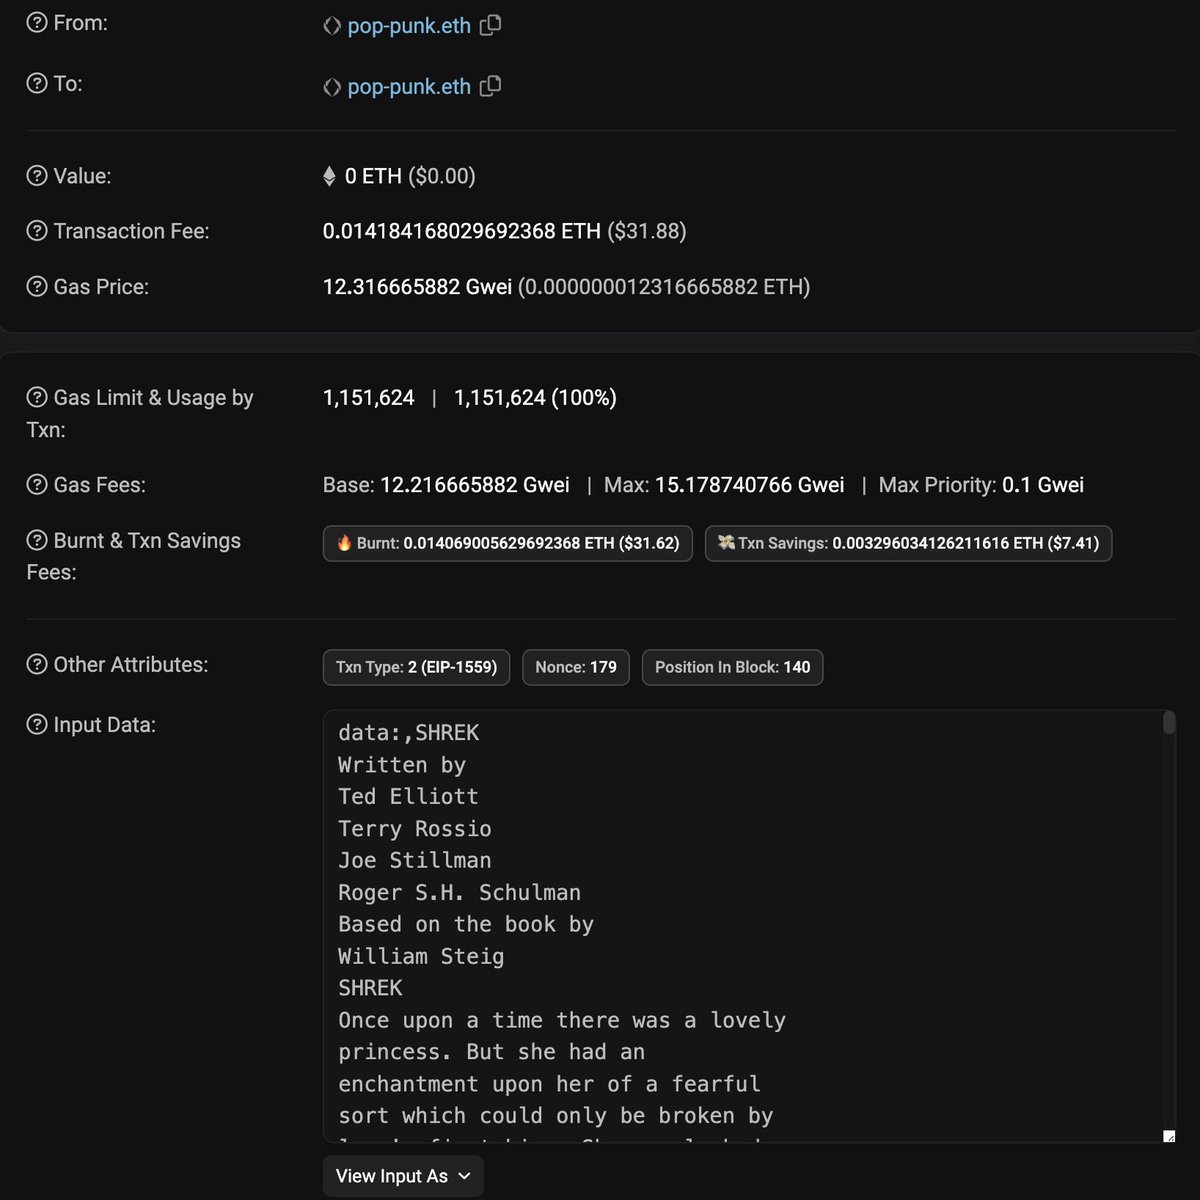
I'm proud to announce that I have inscribed the ENTIRE Shrek movie script on chain where it will live until the end of time.
Here's a list of tickers for major companies that have applied for a spot #Bitcoin ETF and are due to be approved.
• BlackRock - Ticker: IBIT
• ARK Invest - Ticker: ARKB
• Grayscale - Ticker: GBTC
• WisdomTree - Ticker: BTCW
• Invesco - Ticker: BTCO
• Fidelity - Ticker: FBTC
• Valkyrie- Ticker: BRRR
• VanEck - Ticker: HODL
• Bitwise - Ticker: BITB
• Hashdex - Ticker: DEFI
These companies are all eagerly awaiting approval for their spot #BTC ETF applications, which could be granted this upcoming week.
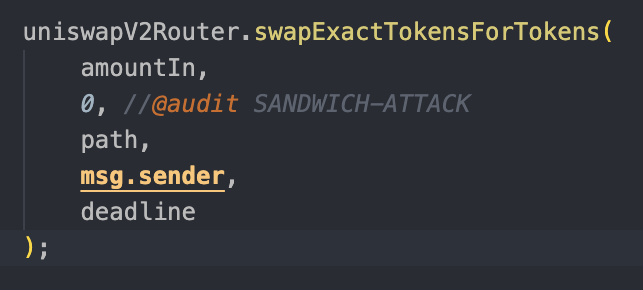
What is a sandwich attack?
Let's consider a simple example:
A slippage/sandwich attack exploits the victim's high slippage tolerance, in our scenario, 10%.
Here's how such an attack typically unfolds:
1. Observation:
The attacker monitors the pool for large pending transactions, such as a substantial buy or sell order, which in this case would be the victim's order. The attacker looks for transactions with high slippage because they offer a wider price range for exploitation.
2. Initiation of the Sandwich Attack:
2.1
First Transaction (Front-Running):
The attacker places a large buy order right before the victim's transaction is executed. Since Uniswap V2 operates on an automated market maker (AMM) model, this buy order increases the price of the token because the AMM adjusts the price based on the ratio of the two tokens in the liquidity pool.
2.2 Victim's Transaction:
The victim's transaction is then executed, but due to the increased price caused by the attacker's buy order, the victim receives fewer tokens than initially anticipated. This is where the high slippage of 10% plays a critical role. It allows the transaction to go through despite a significantly worse rate.
Second Transaction (Back-Running):
After the victim's transaction, the attacker completes the sandwich by selling the tokens they initially bought. This sell order typically moves the price back down, allowing the attacker to profit from the price differential.
2.3 Outcome:
The victim ends up buying at a higher price and/or selling at a lower price than they would have without the attacker's interference. The attacker benefits from the price difference between the three transactions.
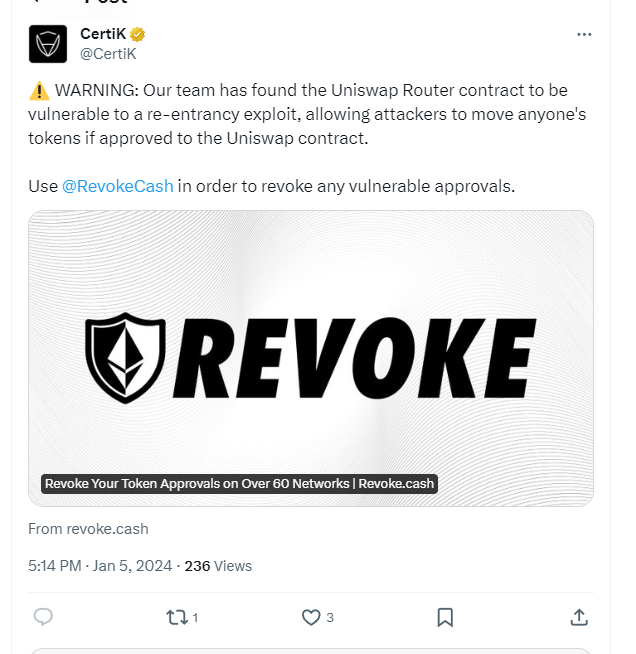
The official Twitter account of security auditing company CertiK has been compromised and phishing links are being posted to defraud users of their wallet funds. Not long ago, the Discord on Certik’s official website was also replaced and turned into a fake Discord with phishing links.
Learn how to test Smart Contracts with Echidna ����
New Video on my YT channel 🔴
I've decided to continue with my commitment to sharing my learnings.
So, I've started a series of videos to show how to use Echidna. My idea is to create short videos with specific features of the tool.
Stick around and you'll be learning as much as I do, but without the hours of research and struggle.
Find the 🔗link to my YT channel on my profile bio!
👇👇👇👇👇👇👇👇👇👇👇👇👇👇👇
Let me know in the comments if you're interested in this content, otherwise, I might not continue.