💎 A00A Coin — powering creativity, supporting artists, and shaping the future of meme artists value 🚀✨
@ancientorderO is a meme artist accelerator, support artist helping them hone skills
No influencer No dump and pumps games
#a00a#sui#defi#srm
🚀 Day 17 — My Journey to Becoming a Frontend Software Developer
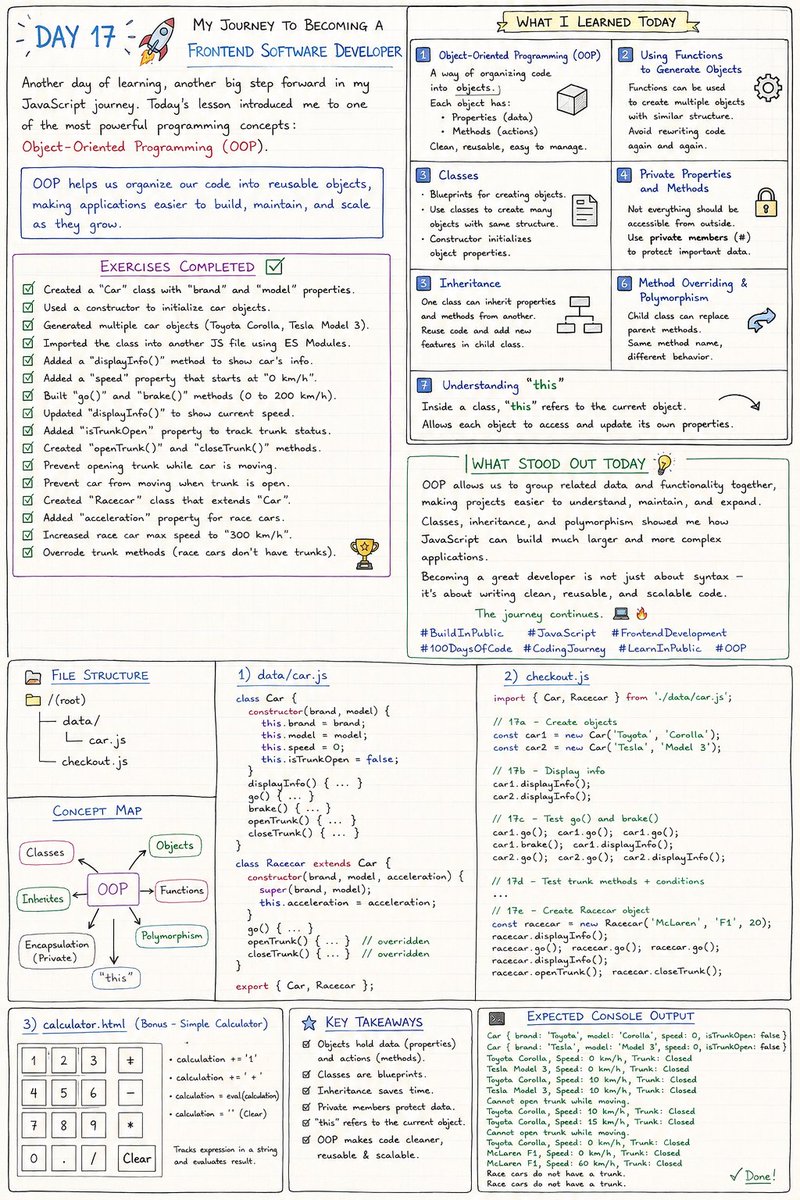
Another day of learning, another big step forward in my JavaScript journey. Today's lesson introduced me to one of the most powerful programming concepts: Object-Oriented Programming (OOP).
OOP helps us organize our code into reusable objects, making applications easier to build, maintain, and scale as they grow.
📚 What I Learned Today
🔹 1. Object-Oriented Programming (OOP)
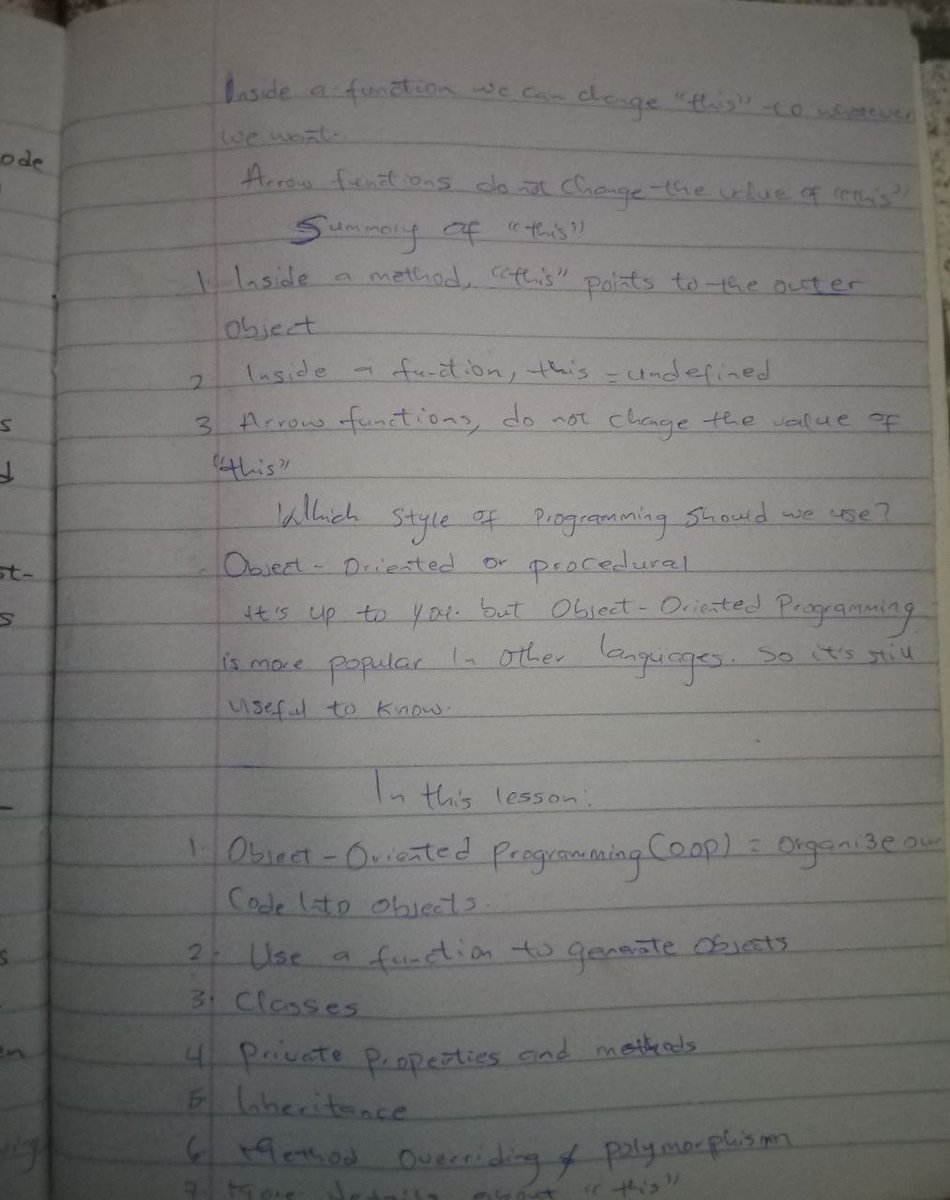
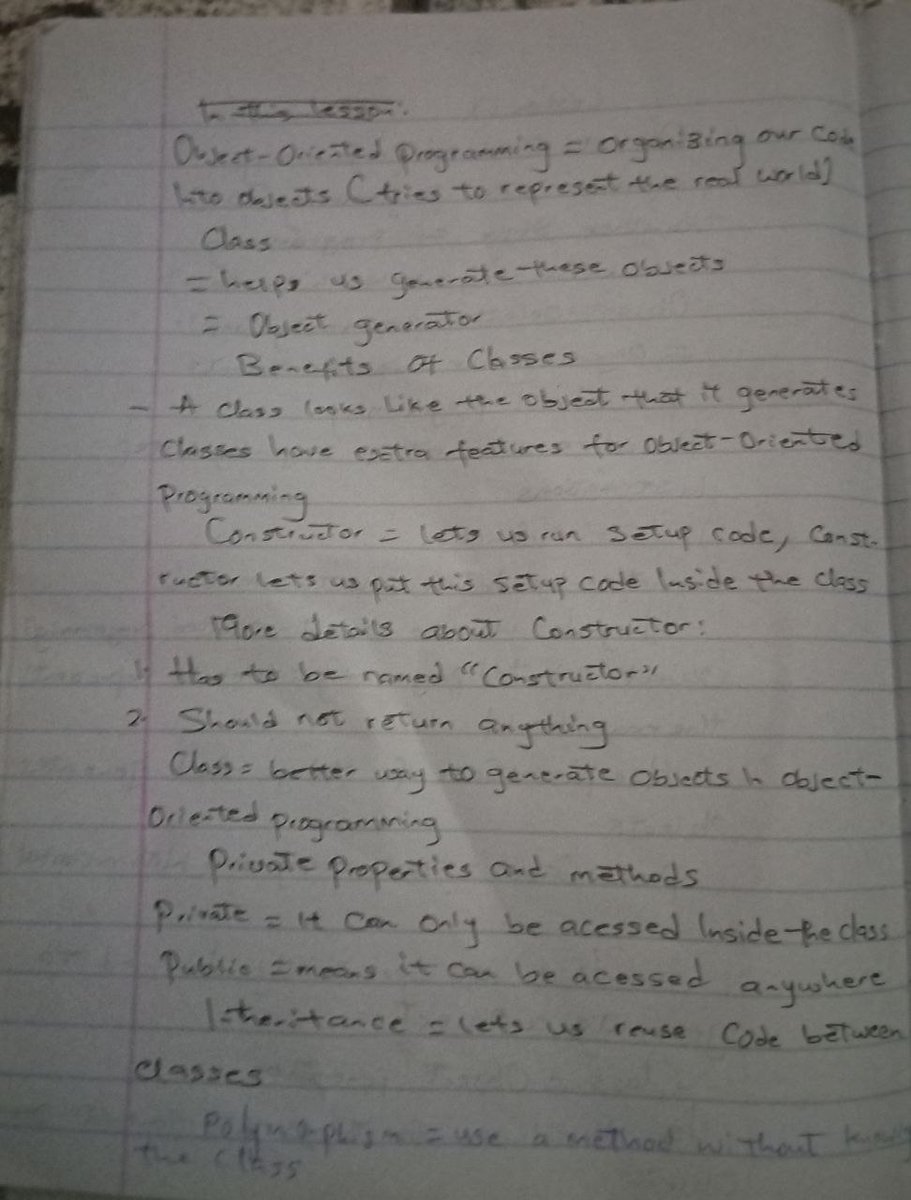
I learned that Object-Oriented Programming is a way of organizing code into objects. Instead of writing the same code repeatedly, we can create objects that contain both data (properties) and actions (methods).
This makes code cleaner, more reusable, and easier to manage.
🔹 2. Using Functions to Generate Objects
Before learning classes, I learned that functions can also be used to generate multiple objects with similar properties and methods.
This helps avoid rewriting the same object structure over and over again.
🔹 3. Classes
I learned how to create classes, which act as blueprints for creating objects.
Using classes allows us to create many objects with the same structure while giving each object its own unique data.
I also learned about constructors and how they automatically initialize an object's properties when it's created.
🔹 4. Private Properties and Methods
I learned that not every property or method should be accessible from outside a class.
Private properties and methods help protect important data by allowing only the class itself to access or modify them.
This makes programs more secure and easier to maintain.
🔹 5. Inheritance
I learned how one class can inherit properties and methods from another class.
Instead of rewriting existing code, a child class can reuse everything from a parent class and add its own extra features.
This reduces duplication and keeps code organized.
🔹 6. Method Overriding & Polymorphism
I learned that a child class can replace a method it inherits from its parent with its own version.
This is called method overriding and is part of polymorphism, allowing different objects to respond differently while using the same method name.
🔹 7. Understanding "this"
I gained a better understanding of the "this" keyword.
Inside a class, "this" refers to the current object that is using the class. It allows each object to access and update its own properties independently.
📝 Exercises Completed
To reinforce today's lesson, I completed all the Object-Oriented Programming exercises.
✅ Created a "Car" class with "brand" and "model" properties.
✅ Used a constructor to initialize car objects.
✅ Generated multiple car objects such as a Toyota Corolla and Tesla Model 3.
✅ Imported the class into another JavaScript file using ES Modules.
✅ Added a "displayInfo()" method to display each car's information.
✅ Added a "speed" property that starts at "0 km/h".
✅ Built "go()" and "brake()" methods to increase and decrease speed while keeping it between "0" and "200 km/h".
✅ Updated "displayInfo()" to show the car's current speed.
✅ Added an "isTrunkOpen" property to track whether the trunk is open or closed.
✅ Created "openTrunk()" and "closeTrunk()" methods with conditions to prevent opening the trunk while the car is moving.
✅ Prevented the car from moving whenever the trunk is open.
✅ Created a "Racecar" class that extends the "Car" class using inheritance.
✅ Added an "acceleration" property so race cars accelerate faster than normal cars.
✅ Increased the race car's maximum speed to "300 km/h".
✅ Overrode the trunk methods because race cars don't have trunks.
💡 What Stood Out Today
Today's lesson showed me how professional developers structure large applications.
Instead of writing long, repetitive code, OOP allows us to group related data and functionality together, making projects easier to understand, maintain, and expand.
Learning concepts like classes, inheritance, and polymorphism made me realize how JavaScript can be used to build much larger and more complex applications than I imagined.
Every lesson reminds me that becoming a great software developer isn't just about learning syntax—it's about understanding how to write clean, reusable, and scalable code.
I'm committed to staying consistent, practicing every day, and documenting this journey publicly. My goal is not just to learn JavaScript, but to become a skilled Frontend Software Developer capable of building modern web applications.
Day 17 ✅
The journey continues. 💻🔥
#BuildInPublic #JavaScript #FrontendDevelopment #SoftwareDeveloper #100DaysOfCode #CodingJourney #LearnInPublic #WebDevelopment #OOP
🚀 Day 16 — My Journey to Becoming a Frontend Software Developer
Another day of learning, another step closer to becoming the frontend developer I aspire to be. Today, I learned about one of the most important parts of software development: Testing.
Testing is important because it helps us find bugs, confirm that our code works correctly, and make sure that changes we make to our code don't break existing features.
Today's lesson introduced me to different types of testing, test cases, test suites, testing frameworks, mocks, spies, integration tests, and hooks.
📚 What I Learned Today
🔹 1. Manual and Automated Tests
I learned the difference between manual testing and automated testing.
Manual testing involves checking our software ourselves to see if everything works as expected.
Automated testing uses code to automatically test our code and check if it produces the expected results.
Automated testing is useful because it allows us to run tests quickly and repeatedly, especially when working on larger projects.
🔹 2. Test Cases and Test Suites
I learned that a test case is an individual test that checks whether a specific part of our code works correctly.
A test suite is a collection of related test cases that are grouped together.
This makes it easier to organize our tests and check different parts of an application.
🔹 3. Testing Frameworks
I learned that a testing framework is a tool that makes it easier to write and run automated tests.
Instead of creating everything from scratch, testing frameworks provide useful features and tools that help developers test their code more efficiently.
🔹 4. Mocks and Spies
I learned about mocks and spies and how they can be used when testing code.
A mock can imitate something that our code depends on, while a spy allows us to monitor a method or function and check how it was used.
For example, I learned how to spy on "localStorage.setItem()" to check whether it was called and what values were passed to it.
🔹 5. Testing Web Pages with Integration Tests
I learned about integration testing, which allows us to test how different parts of an application work together.
Instead of testing only one small function, integration tests can check whether multiple parts of a web page or application work correctly together.
This is useful for testing real-world features and interactions.
🔹 6. Hooks
I learned about testing hooks such as:
• "beforeEach()"
• "afterEach()"
"beforeEach()" allows us to run setup code before each test.
"afterEach()" allows us to run cleanup code after each test.
Hooks help reduce repeated code and make our tests cleaner and easier to maintain.
📝 Exercises Completed
To reinforce today's lesson, I completed the Testing exercises.
✅ Added a test case for "formatCurrency(2000.4)" to check that the number is correctly rounded down to the nearest cent.
✅ Added another test case for "formatCurrency()" using a negative number.
✅ Re-ran all tests to make sure the code was working correctly.
✅ Used ".toHaveBeenCalledWith()" to check the exact values received by a mocked method.
✅ Tested "localStorage.setItem()" to make sure the correct values were saved.
✅ Used "JSON.stringify()" to convert the cart array into a string before checking the value saved to "localStorage".
✅ Added another test to check that "localStorage.setItem()" received the correct values.
✅ Created a "beforeEach()" hook in "cartTest.js" and moved the "spyOn(localStorage, 'setItem')" setup code inside it so the setup could be shared between tests.
✅ Created an "afterEach()" hook in "orderSummaryTest.js" and moved the cleanup code inside it.
💡 What This Lesson Taught Me
Today's lesson helped me understand that writing code is only one part of software development. We also need to make sure that our code actually works correctly.
Testing gives developers confidence when building and changing applications because we can automatically check whether our code is behaving as expected.
I also learned that good testing can help us catch bugs early, prevent existing features from breaking, and make our applications more reliable.
Every lesson reminds me that becoming a software developer isn't about memorizing code—it's about understanding how software is built, tested, improved, and maintained.
I'm committed to staying consistent, practicing every day, and documenting this journey publicly. My goal is not just to learn JavaScript, but to become a skilled Frontend Software Developer capable of building modern, reliable, and functional web applications.
Day 16 ✅
The journey continues. On to Day 17. 💻🔥
#BuildInPublic #JavaScript #FrontendDevelopment #SoftwareDeveloper #100DaysOfCode #CodingJourney #LearnInPublic #WebDevelopment
A quick update. ❤️
I know I've been quiet for the last 2 days.
Something unexpected came up, so I had to step away for a bit. I wasn't able to learn or document my frontend development journey like I normally do.
To everyone who's been following, liking, commenting, reposting, and encouraging me,thank you. I truly appreciate your support, and I'm sorry for disappearing without an update.
I also noticed my engagement dropped while I was away, but that's part of the journey. I'm not letting it stop me.
I'm fully back now. 💻🔥
It's time to keep learning, keep building, and keep documenting every step of my journey to becoming a frontend software developer.
Day 15 continues. Let's build together. 🚀
If you're also learning to code or building in public, let's connect! 🤝
#FrontendDeveloper #FrontendDevelopment #WebDevelopment #SoftwareDeveloper #CodingJourney #BuildInPublic #LearnInPublic #HTML #CSS #JavaScript #100DaysOfCode #CodeNewbie #DevCommunity #Programming #TechTwitter #WomenWhoCode #CodeDaily #Developer #WebDev #OpenToConnect #MenWhoCode #LetsGo
🚀 Day 15 — My Journey to Becoming a Frontend Software Developer
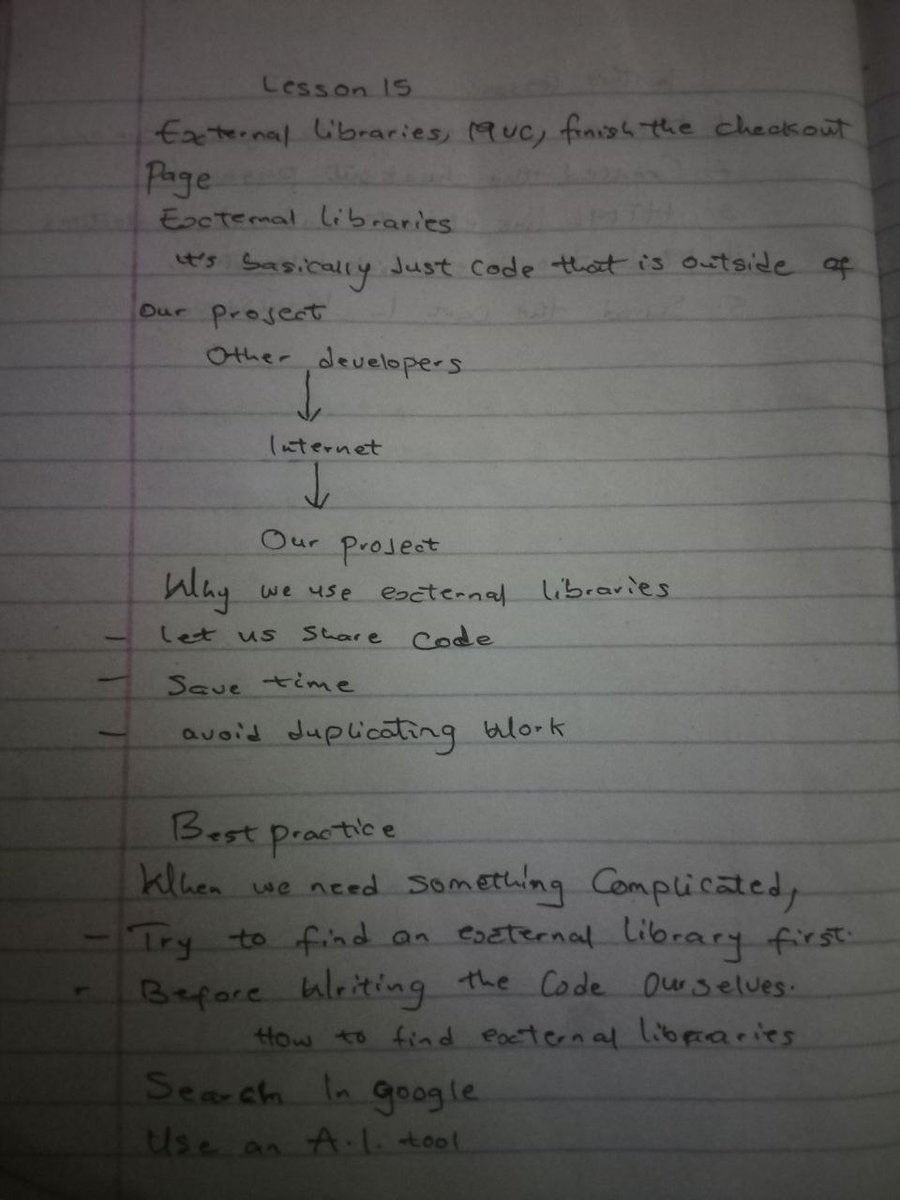
Another day of learning, another step closer to becoming the frontend developer I aspire to be. Today, I learned about External Libraries and the MVC (Model-View-Controller) architecture while continuing to improve my JavaScript skills and work on my Amazon project.
Today's lesson was especially interesting because I started learning how developers can use code written by others through external libraries and how to organize larger projects using different architectural patterns.
📚 What I Learned Today
🔹 1. External Libraries
I learned that external libraries are collections of code created outside of our own project that we can use to add useful functionality without having to build everything from scratch.
This showed me how developers can save time and make their code more efficient by using reliable tools created by other developers.
🔹 2. Using DayJS
I was introduced to DayJS, an external JavaScript library that makes it easier to work with dates and times.
I learned how to use DayJS to:
• Get the current date.
• Add days to a date.
• Add or subtract months.
• Format dates in different ways.
• Get the day of the week from a date.
🔹 3. External Libraries + JavaScript Modules
I learned how external libraries can be used together with JavaScript Modules.
I also learned about "default export" and how to export a function from one JavaScript file and import it into another file.
This helped me understand how developers can organize their code into separate files while still being able to reuse functions across a project.
🔹 4. Created the Delivery Section
As part of improving my Amazon project, I created the delivery section of the checkout page.
This helped me understand how different parts of a real-world e-commerce website can be built and organized using JavaScript, HTML, and CSS.
🔹 5. MVC — Model, View, Controller
I was introduced to the MVC architecture, which stands for:
• Model — Handles the data and information used by the application.
• View — Handles what the user sees on the page.
• Controller — Handles the logic and connects the Model and View together.
Learning about MVC helped me understand the importance of organizing code properly, especially as applications become larger and more complex.
🔹 6. Created the Payment Section
I also created the payment section of the Amazon project.
This gave me more practical experience working on a real-world e-commerce checkout page and helped me understand how different sections of an application can work together.
📝 Exercises Completed
To reinforce today's lesson, I completed the External Libraries and MVC exercises.
✅ Used DayJS to calculate the date 5 days after today and displayed it in the required format.
✅ Used DayJS to calculate 1 month after today's date.
✅ Used the ".subtract()" method to calculate 1 month before today's date.
✅ Used DayJS to get and display the day of the week, such as Monday, Tuesday, or Wednesday.
✅ Created an "isWeekend(date)" function that checks whether a given date is Saturday or Sunday.
✅ Tested the "isWeekend()" function with different dates.
✅ Moved the "isWeekend()" function into a separate JavaScript file.
✅ Used "export default" to export the function and imported it into another file.
✅ Learned that a default export can be renamed when importing it. For example, I changed "isWeekend" to "isSatSun" when importing and used the new name to run the function.
🔹 7. Improved the Amazon Project
I also worked on improving the functionality of my Amazon project.
Instead of directly using the DOM to delete a product from the cart and update the page, I learned how to regenerate the HTML for the order summary.
I also improved the payment summary so that the item quantity displayed on the page is no longer a fixed number.
The cart quantity is now connected to the actual number of items in the cart and updates whenever the cart changes.
💡 What I Took Away From Today's Lesson
Today's lesson helped me understand that building real-world applications isn't just about writing JavaScript code. It's also about knowing how to organize code, reuse functionality, work with external tools, and structure applications in a way that makes them easier to maintain.
I'm beginning to see how concepts like JavaScript Modules, external libraries, and MVC can help developers manage larger projects and write cleaner, more organized code.
Every lesson is bringing me one step closer to my goal of becoming a skilled Frontend Software Developer who can build modern, interactive, and real-world applications.
I'm staying consistent, practicing what I learn, and documenting the journey publicly. The goal is not just to finish a JavaScript course, but to truly understand the skills I'm learning and use them to build useful software.
Day 15 ✅
The journey continues. On to Day 16. 💻🔥
#BuildInPublic #JavaScript #FrontendDevelopment #SoftwareDeveloper #100DaysOfCode #CodingJourney #LearnInPublic #WebDevelopment #DayJS #MVC
🚀 Day 14 — My Journey to Becoming a Frontend Software Developer
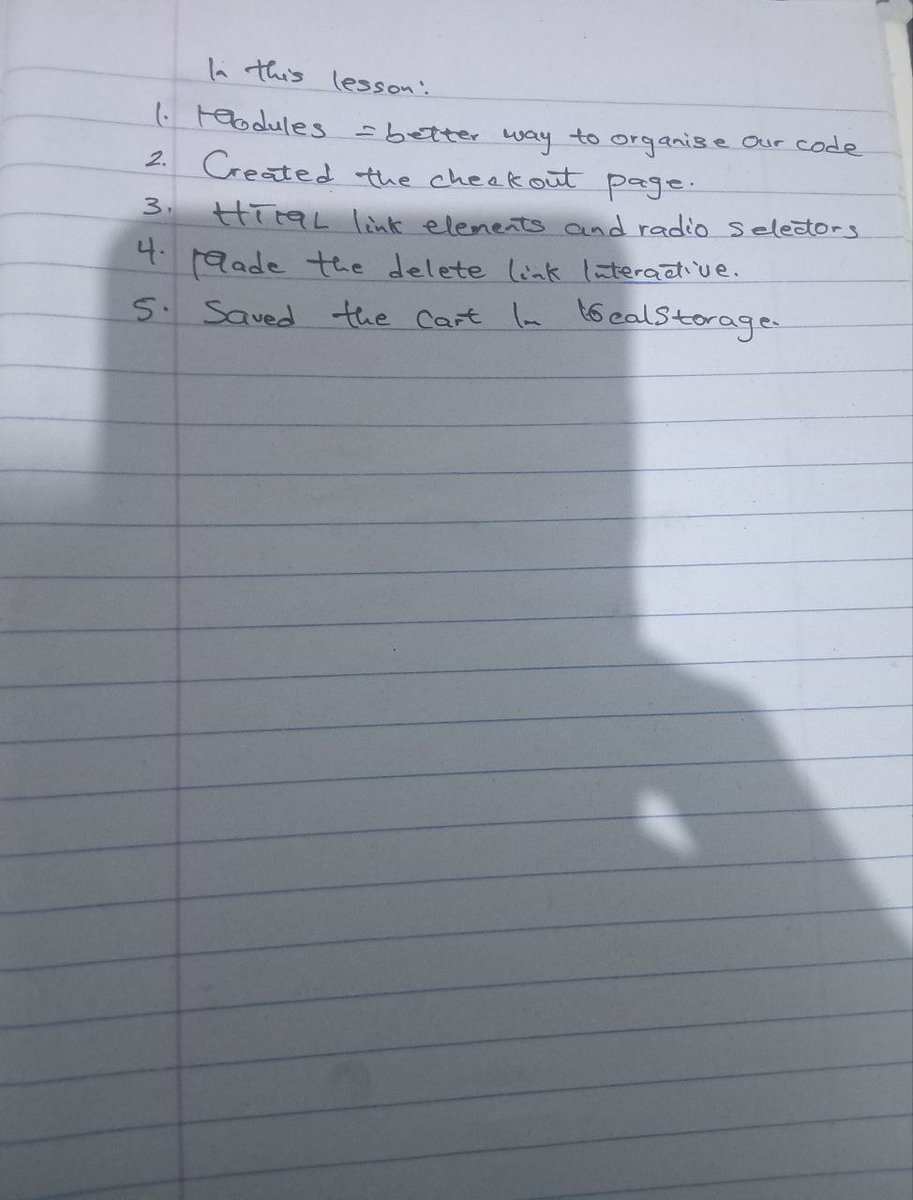
Another day of learning, another step closer to becoming the frontend developer I aspire to be. Today, I continued my JavaScript journey by learning about Modules and how they help us organize our code in a cleaner and more efficient way.
As projects become larger, keeping all our JavaScript code in one place can make things difficult to manage. Modules allow us to split our code into separate files and reuse functions where needed, making our projects more organized and maintainable.
📚 What I Learned Today
🔹 1. JavaScript Modules
I learned how JavaScript Modules help us organize our code by separating different parts of our application into different files.
I also learned how modules allow us to reuse code between files using "export" and "import".
One important thing I learned is that functions with the same name can exist in different modules without conflicting with each other because each module has its own scope.
🔹 2. Created a Checkout Page
I continued working on an Amazon-style project and created a functional checkout page where users can view the products in their cart.
This helped me understand how different parts of a website can work together to create a more realistic shopping experience.
🔹 3. HTML Link Elements & Radio Selectors
I learned more about HTML link elements and how they can be used to create interactive links within a webpage.
I also learned about radio selectors and how they can be used to select specific elements and interact with them using JavaScript.
🔹 4. Made the Delete Link Interactive
I made the delete link on the checkout page interactive.
This allows users to remove products from their cart by clicking the delete link.
I also learned how to update the page after deleting an item so the changes are immediately reflected in the checkout page.
🔹 5. Saving the Cart Using "localStorage"
I learned how to use "localStorage" to save the shopping cart data in the browser.
This means that the cart information can remain available even when the page is refreshed, giving the application a more realistic and useful shopping experience.
📝 Lesson 14 Exercises Completed
To reinforce today's lesson, I completed the Modules exercises.
✅ Removed the hardcoded "3 items" text from the checkout page so the quantity can be dynamically displayed.
✅ Added a class to the checkout header element so it could be selected and updated using the DOM.
✅ Calculated the actual quantity of products in the cart when the checkout page loads.
✅ Displayed the correct cart quantity dynamically in the checkout header.
✅ Created an "updateCartQuantity()" function to handle updating the quantity displayed in the checkout page.
✅ Reused the cart quantity calculation logic from the "amazon.js" file.
✅ Updated the cart quantity whenever an item is deleted from the cart.
✅ Called the "updateCartQuantity()" function when the page loads and whenever the delete link is clicked.
✅ Learned how Modules prevent functions with the same name from conflicting with each other.
✅ Removed the hardcoded "0" from the cart quantity on the Amazon home page.
✅ Updated the cart quantity dynamically when the home page loads.
💡 What I Took Away From Today's Lesson
Today's lesson helped me understand that as applications grow, writing all our JavaScript code in one file can become difficult to manage.
Using Modules makes it easier to organize our code, reuse functions, and keep different parts of our application separated.
I also got more practical experience working with the DOM, "localStorage", event interactions, and dynamically updating content on a webpage.
The checkout page exercise was especially useful because it showed me how different JavaScript concepts can work together to create a more realistic shopping cart experience.
Every lesson reminds me that software development isn't about memorizing code, it's about understanding how different concepts work together to solve real problems.
I'm committed to staying consistent, practicing every day, and documenting this journey publicly. My goal is not just to learn JavaScript, but to become a skilled Frontend Software Developer capable of building modern and interactive web applications.
Day 14 ✅
The journey continues. On to Day 15. 💻🔥
#BuildInPublic #JavaScript #FrontendDevelopment #SoftwareDeveloper #100DaysOfCode #CodingJourney #LearnInPublic #WebDevelopment
🚀 Day 13 — My Journey to Becoming a Frontend Software Developer
Another day of learning, another step forward in my journey to becoming the frontend software developer I aspire to be.
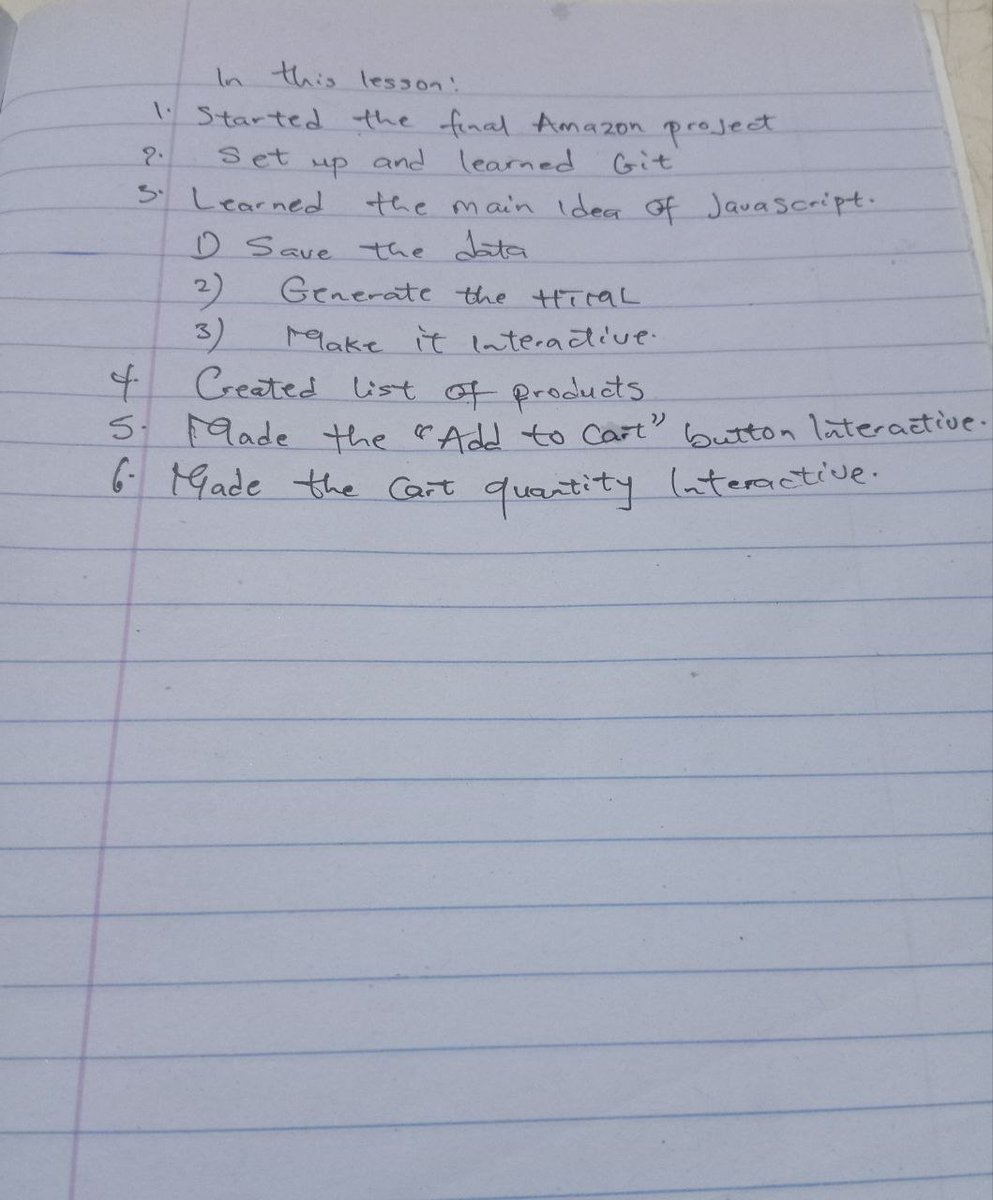
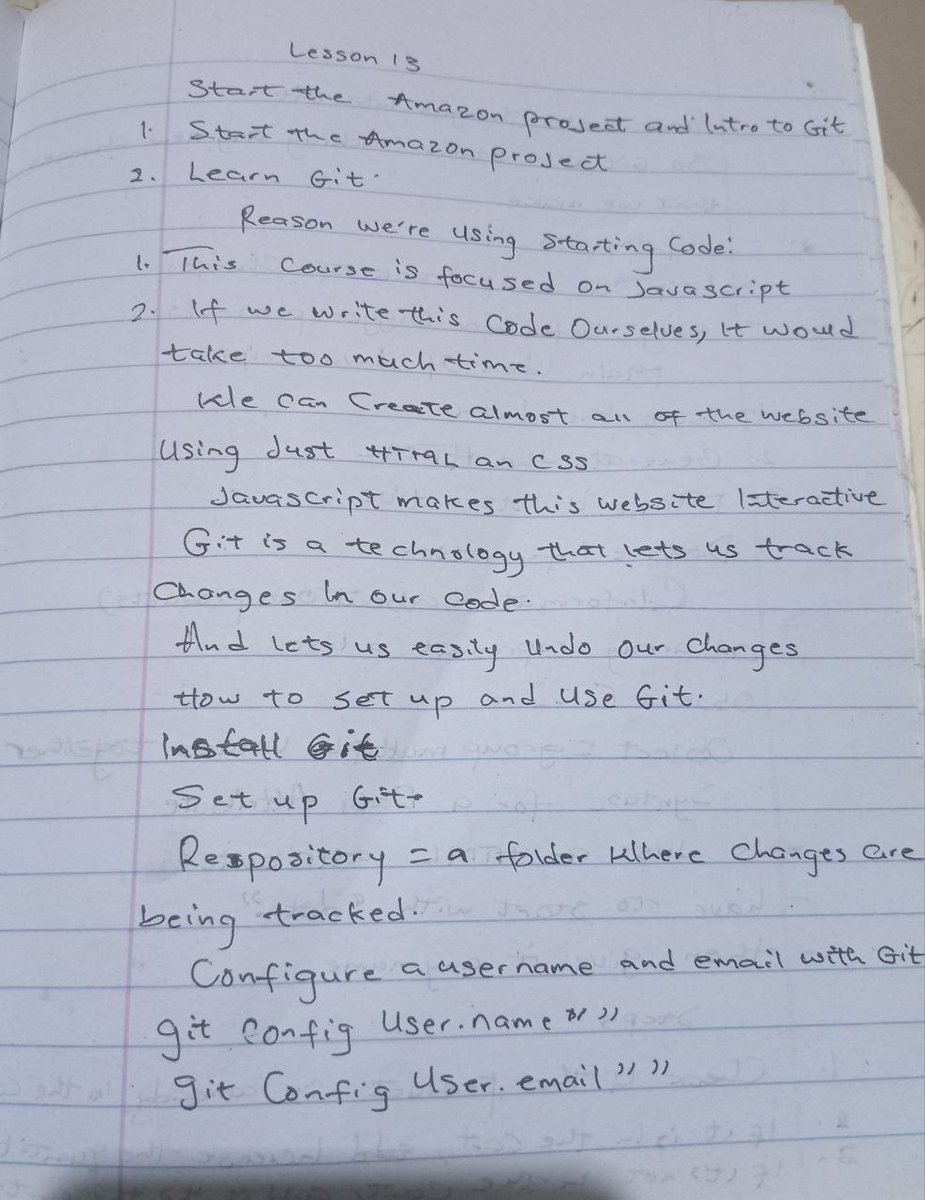
Today was a major milestone in my JavaScript journey because I officially started working on the final Amazon project. I also got introduced to Git, one of the most important tools developers use to track changes and manage their code.
The lesson also helped me understand how the JavaScript concepts I've learned so far can come together to build a more realistic and interactive project.
📚 What I Learned Today
🔹 1. Started the Final Amazon Project
Today, I officially started working on the Amazon project. This project brings together many of the JavaScript concepts I've learned throughout the course and gives me the opportunity to apply them in a more realistic project.
🔹 2. Set Up and Learned Git
I was introduced to Git and learned the main idea behind version control.
Git allows developers to track changes in their code, save different versions of a project, and go back to previous versions when necessary.
I also learned about committing changes, which is an important part of keeping track of my progress as a developer.
🔹 3. Learned the Main Idea of JavaScript
I gained a better understanding of the main purpose of JavaScript and how it can be used to make websites interactive and dynamic.
Instead of creating websites that only display information, JavaScript allows me to create features that respond to user actions and make web applications feel more alive.
🔹 4. Created a List of Projects
I also learned how to create and manage a list of projects within the Amazon project.
This helped me understand how JavaScript can be used to work with data and dynamically generate content on a webpage.
🔹 5. Made the "Add to Cart" Button Interactive
I made the "Add to Cart" button interactive.
Now, when a user clicks the button, the product can be added to the cart and the cart quantity can be updated.
This was exciting because I could see how JavaScript connects user actions with changes on the webpage.
🔹 6. Made the Cart Quantity Interactive
I also made the cart quantity interactive.
The cart quantity can now change based on the products being added, making the shopping experience more dynamic.
This helped me understand how JavaScript can be used to build features that are commonly found in real-world e-commerce applications.
📝 Exercises Completed
To reinforce today's lesson, I worked on the Amazon project exercises and created a quantity selector for products.
✅ Added a unique class to each product's "<select>" quantity selector so that each product could be identified.
✅ Used the DOM to find the correct quantity selector when the "Add to Cart" button is clicked.
✅ Used ".value" to get the quantity selected by the user.
✅ Used "Number()" to convert the selected quantity from a string into a number.
✅ Updated the cart so that it increases by the selected quantity instead of always increasing by 1.
✅ Tested the quantity selector by choosing different quantities and adding products to the cart.
✅ Used Git to check the changes and committed the updated code.
💡 Today's Lesson
Today's lesson showed me how the concepts I've been learning in JavaScript can start coming together to create something that feels like a real application.
I also learned that becoming a developer isn't only about writing code. Tools like Git are an important part of the development process because they help developers manage, track, and organize their work.
The Amazon project is also helping me move from simply learning individual JavaScript concepts to actually using those concepts to build practical features.
Every lesson is another reminder that software development is a journey of continuous learning, practice, and problem-solving.
I'm staying consistent, continuing to practice, and documenting my progress publicly.
My goal is not just to learn JavaScript, but to become a skilled Frontend Software Developer capable of building modern, interactive, and useful web applications.
Day 13 ✅
The journey continues. On to Day 14. 💻🔥
#BuildInPublic #JavaScript #FrontendDevelopment #SoftwareDeveloper #100DaysOfCode #CodingJourney #LearnInPublic #WebDevelopment #Git #GitHub
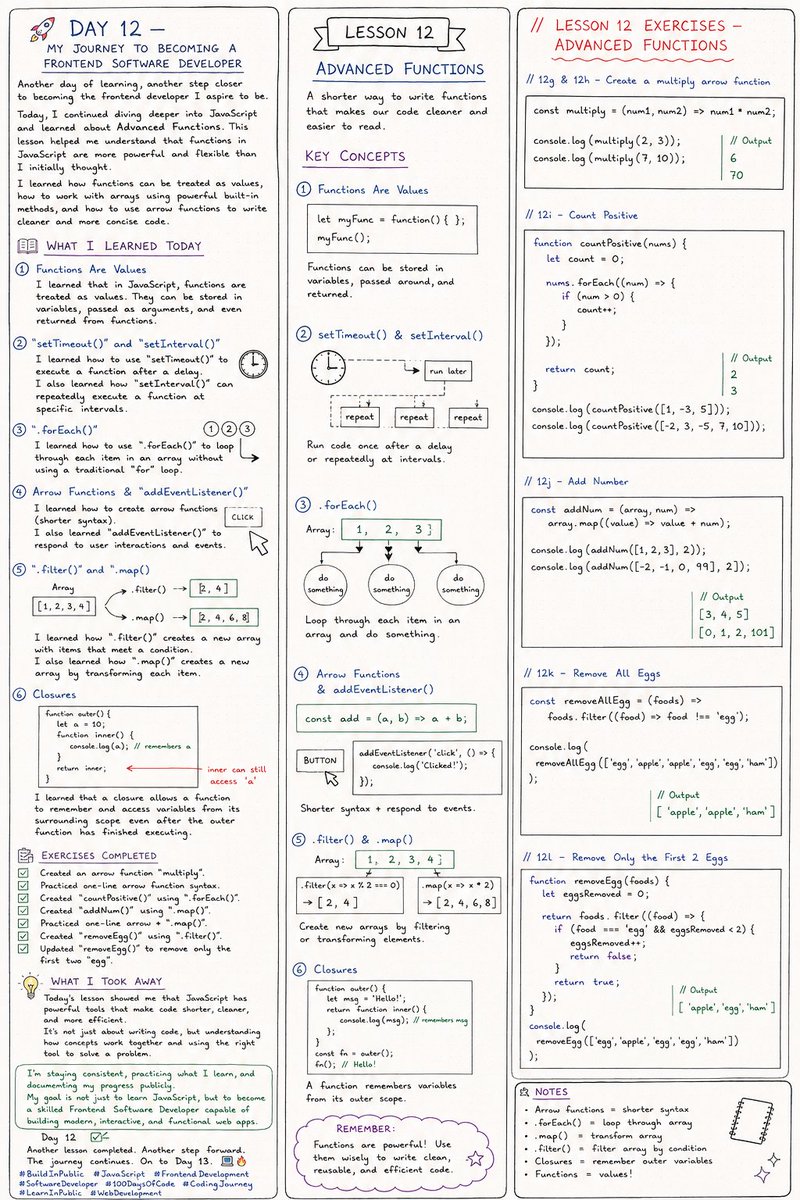
🚀 Day 12 (part 2) — My Journey to Becoming a Frontend Software Developer
Another day of learning, another step closer to becoming the frontend developer I aspire to be.
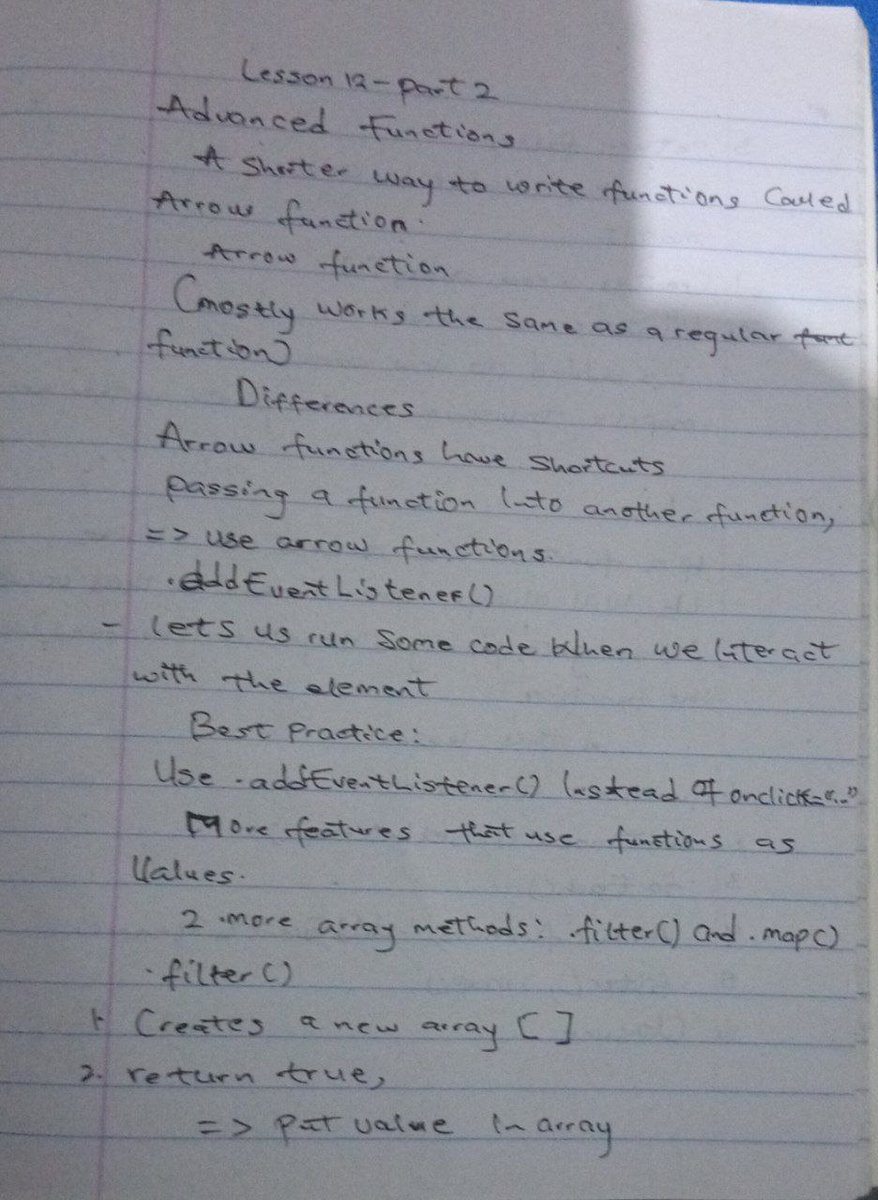
Today, I continued diving deeper into JavaScript and learned about Advanced Functions. This lesson helped me understand that functions in JavaScript are more powerful and flexible than I initially thought.
I learned how functions can be treated as values, how to work with arrays using powerful built-in methods, and how to use arrow functions to write cleaner and more concise code.
📚 What I Learned Today
🔹 1. Functions Are Values
I learned that in JavaScript, functions are treated as values. This means they can be stored inside variables, passed as arguments to other functions, and even returned from functions.
Understanding this concept helped me see why JavaScript functions are so flexible and powerful.
🔹 2. "setTimeout()" and "setInterval()"
I learned how to use "setTimeout()" to execute a function after a specific amount of time.
I also learned how "setInterval()" can repeatedly execute a function at a specific time interval.
These concepts helped me understand how JavaScript can work with time and schedule tasks to happen later.
🔹 3. ".forEach()"
I learned how to use the ".forEach()" method to loop through each item in an array without having to write a traditional "for" loop.
This made it easier to perform an action on every element in an array and helped me write cleaner JavaScript code.
🔹 4. Arrow Functions & "addEventListener()"
I learned how to create arrow functions, which provide a shorter and cleaner way to write functions in JavaScript.
I also learned how to use "addEventListener()" to respond to user interactions and events, such as clicks.
This is an important concept for creating interactive websites and web applications.
🔹 5. ".filter()" and ".map()"
I learned how to use ".filter()" to create a new array containing only the elements that meet a specific condition.
I also learned how ".map()" can create a new array by transforming every element in an existing array.
These array methods are extremely useful when working with data and building real-world applications.
🔹 6. Closures
I was introduced to the concept of closures in JavaScript.
I learned that a closure allows a function to remember and access variables from its surrounding scope even after the outer function has finished executing.
This was one of the more advanced concepts from today's lesson, but it gave me a deeper understanding of how JavaScript functions and scope work behind the scenes.
📝 Exercises Completed
To reinforce today's lesson, I completed the Advanced Functions exercises.
✅ Created an arrow function called "multiply" that takes two numbers, multiplies them together, and returns the result.
✅ Practiced writing arrow functions using the one-line shortcut syntax.
✅ Created a "countPositive()" function using ".forEach()" to count how many positive numbers are inside an array.
✅ Created an "addNum()" function using ".map()" to increase every number in an array by a specific amount.
✅ Practiced using the one-line arrow function shortcut with ".map()".
✅ Created a "removeEgg()" function using ".filter()" to remove "'egg'" from an array of foods.
✅ Updated the "removeEgg()" function to remove only the first two occurrences of "'egg'" while keeping the remaining eggs in the array.
💡 What I Took Away From Today's Lesson
Today's lesson showed me that JavaScript has powerful tools that can make code shorter, cleaner, and more efficient.
I'm beginning to understand how methods like ".forEach()", ".map()", and ".filter()" can simplify the way I work with arrays and data.
I'm also getting more comfortable with arrow functions and event listeners, which are important for building interactive frontend applications.
The more I learn, the more I realize that becoming a good developer isn't just about knowing how to write code. It's about understanding how different concepts work together and knowing which tool to use to solve a problem.
I'm staying consistent, practicing what I learn, and documenting my progress publicly.
My goal is not just to learn JavaScript, but to become a skilled Frontend Software Developer capable of building modern, interactive, and functional web applications.
Day 12 (part 2) ✅
Another lesson completed. Another step forward.
The journey continues. On to Day 13. 💻🔥
#BuildInPublic #JavaScript #FrontendDevelopment #SoftwareDeveloper #100DaysOfCode #CodingJourney #LearnInPublic #WebDevelopment
🚀 Day 12 — My Journey to Becoming a Frontend Software Developer
Another day of learning, another step closer to becoming the frontend developer I aspire to be. Today, I continued my JavaScript journey by diving deeper into one of the most powerful concepts in programming: Advanced Functions.
Today's lesson helped me understand how functions can be treated as values, passed into other functions, and used to create more dynamic and interactive applications.
I also learned how to use JavaScript's "setTimeout()" function and the DOM to create interactive experiences where something happens after a specific amount of time.
📚 What I Learned Today
🔹 1. Functions as Values
I learned that in JavaScript, functions can be stored inside variables just like other values.
For example, I created a variable called "add" and stored a function inside it. I was then able to call that function whenever I wanted.
This helped me understand that functions in JavaScript are very flexible and can be treated like values.
🔹 2. Passing Functions as Parameters
I learned that a function can be passed into another function as a parameter.
This introduced me to the concept of higher-order functions, where one function can receive another function and execute it.
This is an important concept that I know I'll continue using as I progress into more advanced JavaScript and frameworks like React.
🔹 3. Creating a "runTwice()" Function
I created a function called "runTwice()" that accepts another function as a parameter and runs it twice.
This exercise helped me understand how functions can be passed around and reused, making our code more flexible and powerful.
🔹 4. Using "setTimeout()"
I learned how to use "setTimeout()" to delay the execution of a function.
This allowed me to create functionality where an action happens after a specific amount of time instead of immediately.
For example, I created a button that changes its text to "Finished!" after 1 second.
🔹 5. Working with the DOM
I continued practicing how JavaScript can interact with HTML elements through the DOM.
I learned how to select an element, respond to a user's click, and dynamically change the text displayed inside a button.
This is an important part of creating interactive websites and web applications.
🔹 6. Creating Loading States
I learned how to make a button immediately display "Loading..." when clicked and then change to "Finished!" after 1 second.
This introduced me to the idea of loading states, which are commonly used in real-world websites and applications to give users feedback while an action is being processed.
🔹 7. Creating an "Add to Cart" Message
I created an "Add to Cart" button that displays an "Added" message when clicked.
After 2 seconds, the message automatically disappears.
This was another practical example of combining JavaScript, the DOM, and "setTimeout()" to create a more interactive user experience.
📝 Exercises Completed
To reinforce today's lesson, I completed the Advanced Functions exercises.
✅ Created an "add" variable and stored a function inside it.
✅ Used the function to display "2 + 3" in the console.
✅ Created a "runTwice()" function that accepts another function as a parameter.
✅ Used "runTwice()" to execute a function two times.
✅ Used "runTwice(add)" to run the "add" function twice.
✅ Created a button that changes its text to "Finished!" after 1 second.
✅ Modified the button so it immediately displays "Loading..." when clicked.
✅ Changed the button text to "Finished!" after 1 second.
✅ Created an "Add to Cart" button that displays an "Added" message below it.
✅ Used "setTimeout()" to remove the "Added" message after 2 seconds.
💡 Challenge Exercise
Today's challenge introduced me to an important concept: cancelling and resetting a previous "setTimeout()".
I learned that when multiple timers are running, an earlier timer can still execute even after the user clicks the button again.
To solve this problem, I learned how to use:
• "setTimeout()"
• "clearTimeout()"
By storing the timer inside a variable, I was able to use "clearTimeout()" to cancel the previous timer before starting a new one.
This allowed me to "refresh" the 2-second countdown every time the button was clicked.
Now, instead of the message disappearing based on the first click, the 2-second timer starts again whenever I click the button.
This challenge helped me understand how JavaScript handles timers and asynchronous behavior, and it showed me how important it is to manage timers properly when building interactive web applications.
Every lesson continues to remind me that becoming a software developer isn't about rushing through tutorials or memorizing code. It's about understanding concepts, practicing them, solving problems, and learning how everything connects.
I'm staying consistent, building my knowledge one lesson at a time, and documenting the journey publicly.
My goal is not just to learn JavaScript, but to become a skilled Frontend Software Developer capable of building modern, interactive, and useful web applications.
Day 12 ✅
The journey continues. One lesson, one challenge, and one step closer to the developer I want to become. 💻🔥
On to Day 13.
#BuildInPublic #JavaScript #FrontendDevelopment #SoftwareDeveloper #100DaysOfCode #CodingJourney #LearnInPublic #WebDevelopment #TechJourney
🚀 Day 11 (Part 2) — My Journey to Becoming a Frontend Software Developer
Another productive day on my frontend development journey! Today's lesson focused on Arrays and Loops, two fundamental JavaScript concepts that make it possible to work with collections of data and automate repetitive tasks efficiently.
Instead of writing the same code over and over, I learned how to use loops to repeat actions and arrays to organize multiple values inside a single variable. These concepts are essential for building real-world applications.
📚 What I Learned Today
🔹 1. Arrays
I learned that an array is a list of values stored inside a single variable. Arrays can hold numbers, strings, booleans, objects, and many other types of data.
They make it much easier to organize and manage related information in JavaScript.
🔹 2. Loops (While Loop & For Loop)
I learned how while loops and for loops work.
Loops allow JavaScript to repeat a block of code multiple times without writing the same code repeatedly.
I also learned when it's better to use a while loop and when a for loop is the more suitable choice.
🔹 3. The Accumulator Pattern
One of today's most useful concepts was the Accumulator Pattern.
I learned how to create a variable that keeps track of a running result while looping through data.
This technique is commonly used for calculating totals, counting values, building strings, and solving many programming problems.
🔹 4. Building a Todo List Project
Today's lesson became even more exciting because I built a simple Todo List project.
This project combined arrays, loops, and JavaScript logic to store and display tasks, helping me understand how these concepts work together in real applications.
🔹 5. Arrays as References & Destructuring
I learned that arrays are reference values, meaning that assigning one array to another doesn't create a new copy—it points to the same array in memory.
I was also introduced to array destructuring, a cleaner way to extract values from an array into separate variables.
🔹 6. More Features of Loops
I learned additional loop features such as:
• break — Stops a loop immediately when a condition is met.
• continue — Skips the current iteration and moves to the next one.
• Loops inside functions — Combining loops with functions to create reusable and more organized code.
These features make loops much more powerful and flexible.
📝 Exercises Completed
To reinforce today's lesson, I completed the array and loop exercises.
✅ Created an array of strings and searched for the word "search".
✅ Used a loop to display the index where "search" was found.
✅ Returned -1 when the value did not exist inside the array.
✅ Improved the solution using break so the loop stops after finding the first occurrence.
✅ Created a reusable findIndex(array, word) function that searches an array and returns the index of the first matching value.
✅ Returned -1 when the searched word was not found.
🎯 Key Takeaway
Today's lesson showed me how important arrays and loops are in JavaScript.
I can now:
• Store multiple values inside arrays.
• Repeat tasks efficiently using loops.
• Search through arrays.
• Stop loops early using break.
• Skip iterations using continue.
• Build reusable functions that work with arrays.
• Understand how arrays behave in memory.
• Apply these concepts while building practical projects like a Todo List.
Every lesson strengthens my problem-solving skills and brings me one step closer to becoming a skilled Frontend Software Developer.
Day 11 (Part 2) ✅
The journey continues. On to the next lesson. 💻🔥
#BuildInPublic #JavaScript #FrontendDevelopment #SoftwareDeveloper #100DaysOfCode #CodingJourney #LearnInPublic #WebDevelopment #Arrays #Loops #TodoList #Programming
🚀 Day 11 — My Journey to Becoming a Frontend Software Developer
Every lesson keeps reinforcing one thing: programming is all about solving problems with logic. Today, I explored Arrays and Loops, two powerful JavaScript concepts that make it easier to work with multiple pieces of data and automate repetitive tasks.
These concepts are the backbone of writing cleaner, more efficient code and are used in almost every real-world application.
📚 What I Learned Today
🔹 1. Arrays
I learned that an array is a special type of variable that can store multiple values in a single place. Instead of creating many separate variables, arrays help organize related data together.
🔹 2. Accessing & Modifying Array Values
I learned how to access values inside an array using indexes and how to modify existing values by assigning a new value to a specific index.
🔹 3. Finding the Last Value in an Array
I learned that the last element in an array can be accessed using:
"array.length - 1"
This is useful because arrays can have different lengths, and this method always gives the last item.
🔹 4. Swapping Array Values
I learned how to swap the first and last values in an array by storing one value temporarily and then replacing them.
🔹 5. For Loops
I learned how to use for loops to repeat code automatically instead of writing the same code multiple times.
I practiced:
• Counting from 0 to 10 by 2.
• Counting backward from 5 to 0.
🔹 6. While Loops
I also learned that while loops can achieve the same result as for loops but use a different structure depending on the situation.
🔹 7. Creating New Arrays
I learned how to loop through an existing array and create a new array by modifying each value before adding it to the new array.
🔹 8. Functions with Arrays
I combined everything I learned by creating functions that receive arrays, process the data, and return new results.
This showed me how arrays, loops, and functions work together to solve problems efficiently.
📝 Exercises Completed
To reinforce today's lesson, I completed all the Arrays and Loops exercises.
✅ Created an array of numbers and modified the last value.
✅ Built a function that returns the last value of any array.
✅ Created a function that swaps the first and last values in an array.
✅ Used a for loop to count from 0 to 10 by 2.
✅ Used a for loop to count backward from 5 to 0.
✅ Recreated both counting exercises using while loops.
✅ Created a loop that increases every number in an array by 1.
✅ Built an "addOne()" function that returns a new array with every value increased by 1.
💡 Key Takeaway
Today's lesson helped me understand that arrays allow us to store collections of data, while loops allow us to process that data efficiently.
Instead of writing repetitive code, I can now use loops to automate tasks and functions to make my code reusable and easier to maintain.
Every day I spend learning JavaScript brings me one step closer to becoming the Frontend Software Developer I aspire to be.
I'm staying consistent, practicing daily, documenting my journey publicly, and trusting the process.
Day 11 ✅
The journey continues. On to Day 12. 💻🔥
#BuildInPublic #JavaScript #FrontendDevelopment #SoftwareDeveloper #100DaysOfCode #CodingJourney #LearnInPublic #WebDevelopment
🚀 Day 10 — My Journey to Becoming a Frontend Software Developer
Another day, another milestone on my journey to becoming a Frontend Software Developer. Today's lesson was all about combining HTML, CSS, and JavaScript to build interactive web pages. Instead of keeping everything in one file, I learned how to organize code properly and use JavaScript to dynamically change the appearance of elements on a webpage.
This lesson made me realize that creating a website isn't just about making it look good—it's also about making it interactive and writing clean, maintainable code.
📚 What I Learned Today
🔹 1. Reviewed CSS and Added CSS to Projects
I started today's lesson by reviewing CSS fundamentals and applying styles to the projects I'd built previously. It reinforced the importance of separating design from functionality and making websites visually appealing.
🔹 2. Understanding ".classList"
One of the biggest concepts I learned today was the ".classList" property in JavaScript.
It allows JavaScript to work directly with CSS classes by adding, removing, checking, or toggling them. This makes it possible to change the appearance of a webpage based on user interaction without rewriting styles.
Some useful methods I learned include:
- ".classList.add()"
- ".classList.remove()"
- ".classList.contains()"
This showed me how JavaScript and CSS work together to create dynamic user interfaces.
🔹 3. Finished the Rock Paper Scissors Project
I completed the Rock Paper Scissors project by adding the finishing touches and improving the game's functionality.
This project brought together many JavaScript concepts I've learned so far, including:
- Variables
- Functions
- If statements
- Random numbers
- Event handling
- DOM manipulation
Completing the project gave me more confidence because it felt like building a real interactive application rather than just practicing small examples.
🔹 4. Organizing HTML, CSS, and JavaScript into Separate Files
I learned one of the most important best practices in web development—keeping each language in its own file.
Instead of placing everything inside a single HTML file, I now know how to organize projects like this:
- HTML → Structure
- CSS → Styling
- JavaScript → Functionality
This makes projects cleaner, easier to maintain, and much more professional.
📝 Exercises Completed
To reinforce today's lesson, I completed the HTML, CSS, and JavaScript Together exercises.
✅ Created an Amazon-style button using HTML and CSS.
✅ Designed user interface buttons with custom styling.
✅ Used "document.querySelector()" to select an element from the page.
✅ Used ".classList.contains('js-button')" to check whether a button contains a specific class and displayed the result in the console.
✅ Built a button that switches between ON and OFF when clicked by adding and removing an "is-toggled" CSS class.
✅ Expanded the project by creating three separate buttons that can each be toggled independently.
✅ Improved the code by creating a reusable JavaScript function instead of repeating the same logic multiple times.
✅ Organized the project by separating the HTML, CSS, and JavaScript into their own individual files, following standard development practices.
💡 Key Takeaways
Today's lesson helped me understand that JavaScript isn't only about calculations and logic—it also controls what users see and interact with on a webpage.
By combining HTML, CSS, and JavaScript, I can now build interfaces that respond to user actions, change styles dynamically, and keep my projects organized like professional developers do.
Learning about ".classList" was especially valuable because it's a feature I'll use repeatedly when building buttons, menus, forms, dark mode toggles, navigation bars, and many other interactive components.
Every lesson is helping me connect the dots, and I can clearly see how each concept builds on the previous one.
I'm staying consistent, practicing every day, and documenting my progress publicly. Every line of code I write brings me one step closer to becoming the Frontend Software Developer I aspire to be.
Day 10 ✅
The journey continues. On to Day 11. 💻🔥
#BuildInPublic #JavaScript #FrontendDevelopment #SoftwareDeveloper #100DaysOfCode #CodingJourney #LearnInPublic #WebDevelopment
All Paid Courses (Free for First 4500 People)
𝗣𝗮𝗶𝗱 𝗖𝗼𝘂𝗿𝘀𝗲 𝗙𝗥𝗘𝗘 (PART - 1)
1. Artificial Intelligence
2. Machine Learning
3. Prompt Engineering
4. Claude,Chatgpt,Grok
5. Data Analytics
6. AWS Certified
7. Data Science
8. BIG DATA
9. Python
10. Ethical Hacking
(72 Hours only )
Like + RT + comment ' Drive '
Must Follow me so I can DM you.
This honestly looks like a solid $ChillTown entry zone. Chart still holding strong while most weak hands already got shaken out 👀
Ca: FeoAtVjDcpkjJo6RZRcGY4Wysvn5odLEc29FvmR1vECB
@Kiwi_Nod You move forward — I preserve the trail.
You rewrite your story — I retain the original.
You follow instinct — I rely on what’s documented.
Different paths. Different archives. Different truths.
0xff19515999A85FCEB17811076b8a534eAA46B534
@Kiwi_nod
CREATE A HERO & EARN LIFETIME ROYALTIES!
Today we are opening a new chapter in creating a LORE with our community, where NFTs become part of IP that our community will co-own.
It is time to make something special. We want you to create an image of A HERO OF VALDIR!
CREATORS CALL
We invite you to create a Medieval Fantasy HERO that represents you in our lore.
Choose one of six races: Orcs, Undead, Demons, Cat-People, Elves, or Humans.
This isn't just a creative contest – it's your chance to become a co-owner of our IP! We will select the top 3 heroes from each race (18 winners in total) to feature in our upcoming PvP Vibe NFT collection (dropping in VibeBoxes at the end of the pre-launch).
THE PRIZES:
A $1,000 prize pool will be shared equally among the 18 winners!
Winners will earn a 3% royalty on every single secondary market sale of their character!
Guaranteed reward: EVERY participant will receive an NFT with a deposit ranging from $10 to $5,000!
RULES:
1️⃣ Quote repost this post and attach your created hero.
2️⃣ Tag 3 creators.
3️⃣ Use prompt and fill out the Google Form (in the comment)
Be sure you follow @zargates and @pvp_vibe and add the hashtags: #AIart #zargates #pvpvibe
⏳ Deadline: May 14th, 9 PM UTC
Let's go!
HAPPY ZARGATES WEEK EVERYONE!
We have successfully pre-launched our awesome AI game creation service, @pvp_vibe and we are now steadily gaining several thousand registrations per day.
This has all been possible thanks to you, our dear community!
$2,400 REWARD POOL DISTRIBUTED
We are happy to reward our top 40 ambassador candidates — who, starting today, are no longer just candidates!
Congratulations to: @Shadid_web3, @SaadAmrrun, @BRICK_H_Q, @XanVoid, @bigave_, @RAW1894, @InnovativeRichy, @Valjnr001, @priznes, @Brittney0009, @kaswizofficial, @BigBen7077, @JayCT, @crybto7, @TheresiaBaby, @Sirr_ustazouu, @Coblesweb3, @farm_ion, @Dan_crypt, @0x_CryptoFuture, @prufboogie, @davidbaseeth, @still_gordon, @shafique903, @Promzy_M, @pigrichh, @kieu20011, @philp_michaeI, @YusufPlug_, @StormFrens, @EdBlock01, @VPhm23380671, @JehuHQ, @Skuullls, @web3lady_, @TosinCrypt, @Big_Ohms_, @LekeboyxCrypt, @hezzyboy_, @AnasteciaFranc2
Of course, this is not the last reward! You are already receiving liquid assets, and we have more drops planned!
COMMUNITY IS THE POWER
At the core of ZarGates is the team's drive to build the best gaming products in Web3, but the real value is the community.
Right now, we have a unique opportunity to bring to life a project that will forever change the perception of gaming in Web3 and NFTs, giving millions of people the ability to create games using their imagination and monetize them right away.
This means that now is the time to do what we became Web3 believers for: find the gem, launch it to the moon, and make great profits.
VALUE CREATES VALUE
Every post you make, every friend you invite, and every dollar you spend is counted and adds to one big momentum that grows stronger every single day. It is on this data that we are building our motivation system.
Thank you for your trust! Together, we will make ZarGates the top GameFi project in Web3.
Cheers to champions! ZarGates to the moon!