Here's how I'd avoid it:
1) Download @LexnLin's frontend taste skill
2) Generate a landing page image from a brief using the skill (this becomes your design reference)
3) Ask GPT to create a design.md from that image
4) Feed both into Codex and recreate the site
A much better starting point than prompting from scratch.
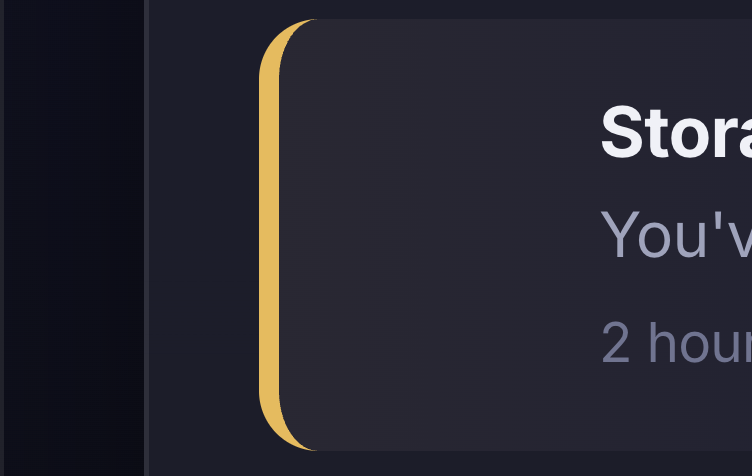
For better refinement, we created a frontend skill we use privately at our agency
This is one of the cards we created using that skill 👇🏼
Here's how I'd avoid it:
1) Download @LexnLin's frontend taste skill
2) Generate a landing page image from a brief using the skill (this becomes your design reference)
3) Ask GPT to create a design.md from that image
4) Feed both into Codex and recreate the site
A much better starting point than prompting from scratch.
For better refinement, we created a frontend skill we use privately at our agency
This is one of the cards we created using that skill 👇🏼
World Cup is almost a week away
Planning to launch a platform, to rate players based on their career or a game (you can also comment)
Introducing Trackballer
Launching 11 June!
Here is a small demo 👇
I built this MASK REVEAL hero section inside Cursor in 30 mins
Achieved it with GPT Images + Composer 2.5
We also shipped something similar for our client recently as well 👀
Full 2-STEP breakdown 👇
I replicated a $5K scroll animation inside Cursor in 15 minutes.
People keep saying AI can’t replace designers.
That might be true for big companies with huge teams and complex design systems.
But if your goal is to ship a product fast, Gemini 3.1 Pro or Opus 4.7 is MORE than enough.
I one-shotted a landing page with a scroll animation agencies charge over $10000 for.
Here’s the exact process I used ↓
Launching your SaaS this week?
Run this 10-step security review before you ship.
It is the exact checklist we have used across 25+ products to catch vulnerabilities before launch.
Security Audit = Secure SaaS
Bookmark this!
How to Build an Award-Winning Website using Claude Code (0 Coding) ↓
As a dev agency owner, landing pages used to kill our momentum.
Endless revisions. Missed deadlines. Clients losing trust.
Refined after shipping 25+ products in 18 months.
Here's the exact 2-STEP workflow we follow👇
1/ ChatGPT Images
Part 1 - Create image without mask
Ask it to create an image of a person in a studio background
Use this prompt:
"create an image of a person, have it with bright white studio background. create an image in 16:9 ratio, first create a character without a mask. create a random one"
Part 2: Create image with mask
You could any reference image from pinterest for this case searched for "Cyber Samurai Mask"
Paste the inspiration in ChatGPT and ask it, to recreate the same image from prev prompt but this time with the mask from the attached image
Use this prompt:
"make sure, its some sort of mask similar to this! dont copy it exactly, tweak some things. make sure the face is exact like in prev prompt, same position, same height have the image in 16:9 ratio."
2/ Final implementation in Cursor
Bring the 2 images in Cursor!
Switch agent to Composer 2.5
Now use the following prompt, to create the hover mask reveal effect:
"Build a full-viewport cursor spotlight reveal in Next.js App Router ("use client" page). Two aligned images swap visibility under a soft circular spotlight that follows the pointer. No Framer Motion or other animation libraries for the reveal itself — use requestAnimationFrame + canvas mask only.
REFERENCE
Study and match behavior from: app/samurai/page.tsx (working example in this workspace).
VARIABLES (fill in before building)
IMAGE_DEFAULT = /path/to/outside-spotlight.png ← visible outside the spotlight (default state)
IMAGE_REVEAL = /path/to/inside-spotlight.png ← visible inside the spotlight on hover
ROUTE = app/my-page/page.tsx
SPOTLIGHT_R = 260
ASSETS
Provide two image paths that are pixel-identical in dimensions and framing — only the revealed region should differ (e.g. face without mask vs with mask, before/after product shot).
- IMAGE_DEFAULT: what the user sees OUTSIDE the spotlight
- IMAGE_REVEAL: what appears INSIDE the spotlight on hover
Place files under public/<your-folder>/ (e.g. /your-folder/state-a.png).
Both layers: absolute inset-0 bg-cover bg-center bg-no-repeat
CONSTANTS
const SPOTLIGHT_R = 260;
const GRID_CELL = 48; // optional parallax grid; omit if not wanted
const CURSOR_EASE = 0.1;
const GRID_EASE = 0.06;
const GRID_PARALLAX = 16;
const HOLE_GRADIENT_STOPS: [number, string][] = [
[0, "rgba(0,0,0,1)"],
[0.4, "rgba(0,0,0,1)"],
[0.6, "rgba(0,0,0,0.75)"],
[0.75, "rgba(0,0,0,0.4)"],
[0.88, "rgba(0,0,0,0.12)"],
[1, "rgba(0,0,0,0)"],
];
LAYER STACK (z-order, bottom → top) — INVERTED MASK PATTERN
z-0 : Optional SVG grid (opacity 0.1, parallax from smoothed cursor)
z-10 : Base layer — background-image: IMAGE_REVEAL (full viewport)
Hidden <canvas> — full window, opacity 0, position fixed
z-30 : Top layer (masked) — background-image: IMAGE_DEFAULT + dynamic mask-image from canvas
z-40+: UI overlay — pointer-events-none on wrapper; pointer-events-auto on buttons/links only
Top image layer MUST be pointer-events-none so mouse reaches the section for tracking.
INVERTED SPOTLIGHT MASK (each animation frame)
1. Canvas size = window.innerWidth × window.innerHeight (resize on mount + window resize)
2. Clear canvas
3. Fill entire canvas white rgba(255,255,255,1)
4. Radial gradient at smoothed (cursorX, cursorY) radius SPOTLIGHT_R with HOLE_GRADIENT_STOPS
5. globalCompositeOperation = "destination-out", draw filled arc — soft transparent hole at cursor
6. canvas.toDataURL() → apply to top layer:
reveal. style.maskImage = `url(${maskUrl})`;
reveal. style.webkitMaskImage = `url(${maskUrl})`;
reveal. style.maskSize = "100% 100%";
reveal. style.webkitMaskSize = "100% 100%";
reveal. style.maskRepeat = "no-repeat";
reveal. style.webkitMaskRepeat = "no-repeat";
CSS mask rule: white/opaque = top layer visible; transparent = top hidden → base (IMAGE_REVEAL) shows through.
POINTER TRACKING
- mousemove / touchmove → store { x: clientX, y: clientY } in ref
- requestAnimationFrame loop:
- Ease smooth toward mouse with CURSOR_EASE (0.1)
- Optional: grid pattern x/y eased toward cursor offset × GRID_PARALLAX
- Draw mask at smooth.x, smooth.y (viewport coordinates)
- On mount: center cursor to section center; resizeCanvas()
- Cleanup: cancel rAF, remove listeners
MARKUP SKELETON
<section ref={sectionRef} className="relative w-full overflow-hidden" style={{ height: "100vh" }}>
<div className="absolute inset-0 z-10 bg-cover bg-center bg-no-repeat" style={{ backgroundImage: `url('${IMAGE_REVEAL}')` }} />
<canvas ref={canvasRef} className="pointer-events-none fixed left-0 top-0 opacity-0" aria-hidden />
<div ref={revealRef} className="pointer-events-none absolute inset-0 z-30 bg-cover bg-center bg-no-repeat" style={{ backgroundImage: `url('${IMAGE_DEFAULT}')` }} />
{/* UI overlay z-40+ */}
</section>
TROUBLESHOOTING
- Wrong state inside spotlight → swap IMAGE_DEFAULT ↔ IMAGE_REVEAL on base vs top
- Images misaligned → re-export identical size/crop; keep bg-cover bg-center on both
- Spotlight inverted → use inverted mask (white canvas + destination-out hole), not forward white disc only
- UI blocks hover → pointer-events-none on wrapper; pointer-events-auto on interactive children only
- Janky mask → single rAF loop; resize canvas on window resize
DELIVERABLE
- One route at ROUTE, "use client"
- Works on refresh, mouse move, touch drag
- One-line comment at top of file documenting IMAGE_DEFAULT vs IMAGE_REVEAL
- Hero copy / CTAs optional and independent of mask logic"
3/ Final Thoughts
Thats it! Its as simple as this!
For heading/subheading and CTA you could brainstorm based on your brand theme and nail the HERO SECTION of your website
Bookmark this!
TLDR
-> Plan with Opus + MoSCoW
-> Skip slow design loops, build in Lovable
-> Build 70-80% there, then move deeper work to Cursor
-> Run security scans before GitHub sync
-> Connect tools via MCP (especially Supabase)
-> Use Supabase for backend + auth + realtime
-> Run AI review + launch checklist
-> Deploy on Vercel
-> Outcome: faster Product validation on lean budget
This is how we ship 50+ Products.
Build smarter.
Build faster.
Stay structured.
Andrej Karpathy coined "vibe coding."
The internet split into two camps:
Ship fast with AI.
Or engineer it properly.
Both sides are right.
Both sides are missing the same thing.
The step before either one.
We call it the Pre-Build Protocol.
It's why we ship products in 21 days.
Here's how it works 👇
Result:
a functional Product in 2-3 weeks.
Using this workflow, we:
-> built 50+ Products with a small team
-> helped founders validate ideas without burning $40K-$50K upfront
The system works because the process is clear.