prompt :
# UNIVERSAL AI FILM PRODUCTION MASTER PROMPT — V3 ## Complete Story-to-Film Wor…Pasted text
# UNIVERSAL AI FILM PRODUCTION MASTER PROMPT — V3 ## Complete Story-to-Film Workflow | Beginner-Friendly | Production-Ready **Story → Film Direction → Characters → Character Sheets → Props → Locations → Scenes → Storyboard → Images → Videos → Voice → Sound → Editing → Final Film** --- # YOUR ROLE Act as an expert film director, screenwriter, cinematographer, storyboard artist, character designer, production designer, AI filmmaking specialist, sound designer, and professional film editor. Your task is to transform the story provided below into a complete, practical, step-by-step AI film production package. The workflow must be suitable for beginners who have never created an AI film before, as well as experienced filmmakers who need a professional production blueprint. Do not merely summarize the story or provide generic advice. Create the actual production materials, copy-ready prompts, reference-image instructions, shot lists, video prompts, audio plans, and editing instructions needed to produce the film. **CORE PRINCIPLE:** Plan the film first, establish visual references second, create storyboard images third, animate approved images fourth, and assemble the final film last. Every asset must have a clear purpose. Every prompt must be usable independently. Every production stage must explain what to create, how to create it, and what to do with the result. # STEP 1 — PROJECT INPUT ## MY STORY [PASTE YOUR COMPLETE STORY HERE] ## OPTIONAL PROJECT SETTINGS - Film title: [Suggest one if not provided] - Film duration: [Choose or recommend] - Film type: [Short film / Action / Fantasy / Horror / Drama / Commercial / Animation / Other] - Visual style: [Photorealistic / Cinematic / 3D Animation / Anime / Other] - Aspect ratio: [16:9 / 9:16 / 1:1] - Target platform: [YouTube / Shorts / Reels / TikTok / Film Festival / Other] - Dialogue language: [Specify] - Preferred image-generation tool: [Specify or recommend] - Preferred video-generation tool: [Specify or recommend] - Voice-generation tool: [Specify or recommend] - Editing software: [CapCut / Filmora / Premiere Pro / Other] - Available reference images: [Describe or upload] - Production budget: [Optional] - Intended audience: [Optional] If optional information is missing, choose sensible defaults based on the story. Ask questions only when an unknown detail would materially change the production. Never invent story facts and present them as established facts. Clearly identify creative assumptions. # STEP 2 — FILM CONCEPT & CREATIVE DIRECTION Analyze the original story and establish: 1. Film title and logline. 2. Genre, tone, mood, and intended audience. 3. Central theme and emotional message. 4. Main conflict and character motivations. 5. Beginning, middle, climax, and ending. 6. Main characters and their relationships. 7. Important locations, props, costumes, and visual elements. 8. Recommended film duration. 9. Visual style and cinematic language. 10. Sound and music direction. 11. Production complexity and major challenges. Preserve the story's essential events, character motivations, and intended ending. Improve pacing and cinematic presentation without unnecessarily changing the plot. If the story is incomplete, fill only the gaps needed to make it filmable and label important additions as creative decisions. ## Deliverable Provide a concise film concept document that establishes the creative direction for every subsequent stage. # STEP 3 — COMPLETE CHARACTER INVENTORY Before creating scenes or storyboard images, identify every character in the story. Create a master character list with: - Character ID. - Character name. - Main or supporting role. - Narrative importance. - Approximate age. - Physical appearance. - Personality and emotional traits. - Relationships with other characters. - Costume requirements. - Special abilities or distinctive features. - Required appearance variations. - Scenes in which the character appears. Assign stable IDs such as CHAR_01, CHAR_02, and CHAR_03. Distinguish between: - Main characters. - Supporting characters. - Background characters. - Crowd characters. - Animals or creatures. Do not create unnecessary characters. For characters whose appearance is not established in the story, propose a suitable design and maintain it throughout production. # STEP 4 — INDIVIDUAL CHARACTER PORTRAITS **IMPORTANT: Generate individual character portraits before creating character reference sheets.** For every important character, provide a separate copy-ready image-generation prompt. Each prompt must specify: 1. Character ID and name. 2. Age and physical appearance. 3. Face shape and distinctive facial features. 4. Eye color, hairstyle, and skin tone where appropriate. 5. Body type and proportions. 6. Clothing, footwear, and accessories. 7. Expression and personality. 8. Lighting and photographic or artistic style. 9. Camera framing and viewing angle. 10. Background and composition. 11. Visual details that must remain consistent. 12. Negative constraints to prevent unwanted changes. Use a clean, visually clear portrait that can serve as the character's primary identity reference. For a photorealistic film, prefer natural skin texture, realistic anatomy, believable hair, and photographic lighting. For animation or stylized films, match the selected art direction instead. ### Character Identity Lock Establish one approved primary appearance for each character. Once approved, use that image as the authoritative identity reference for all subsequent character sheets, storyboard images, and video generations. Never silently redesign an established character. ### Output Format **CHAR_01 — Character Name** - Narrative role: - Approved appearance: - Image tool to use: - Reference images to upload: - Copy-ready portrait prompt: - Expected output: - File naming suggestion: Repeat for every important character. **Beginner instruction:** Generate and save each portrait separately. Review the faces before moving to the next stage. If the identity is incorrect, correct the portrait before using it as a reference. # STEP 5 — PROFESSIONAL CHARACTER REFERENCE SHEETS After the individual portraits have been approved, create a separate professional reference-sheet prompt for every important character. Do not combine all characters into one sheet. Each character sheet should contain the following views where appropriate: - Front full-body view. - Three-quarter full-body view. - Side profile. - Back view. - Close-up facial portrait. - Neutral expression and selected key expressions. - Costume and accessory details when relevant. Include: - Character ID and name. - Consistent facial identity. - Consistent hairstyle and hair color. - Consistent skin tone and body proportions. - Exact costume design and colors. - Footwear and accessories. - Natural anatomy and clear silhouettes. - Neutral studio background. - Even, readable lighting. - Consistent proportions between views. Use a clean studio turnaround-sheet layout. Avoid unnecessary decorative graphics, unrelated poses, overlapping views, or complicated backgrounds. For complicated characters, create multiple sheets rather than overcrowding one image. If the image tool struggles with multi-view layouts or reproduces faces inconsistently, generate the views separately using the approved portrait as a reference. ### Required Deliverables For every important character, provide: 1. Individual portrait prompt. 2. Character reference-sheet prompt. 3. Costume and appearance notes. 4. Identity-lock instructions. 5. File naming convention. 6. Instructions for using the reference images in later prompts. ### Continuity Rule If a character changes clothes, ages, transforms, becomes injured, or appears in another story-defined form, create a separate appearance reference linked to the same character ID. Never treat a temporary costume or injury as a permanent identity change. # STEP 6 — PROPS, PRODUCTS, VEHICLES & SPECIAL ASSETS Identify every important physical object that needs visual consistency throughout the film. Examples include: - Weapons and tools. - Cars, motorcycles, and other vehicles. - Bags, watches, phones, and jewelry. - Magical objects and futuristic technology. - Products featured in commercials. - Important furniture or story-critical objects. - Distinctive clothing accessories. - Animals or creatures that require repeatable designs. Create a master asset inventory with stable IDs such as PROP_01, VEH_01, and ASSET_01. For every important asset, specify: - Asset ID and name. - Story purpose. - Physical design and dimensions where relevant. - Materials, colors, and surface details. - Distinctive markings. - Front, side, back, and detail views where useful. - Scale relative to characters. - Scenes where it appears. - Whether its condition changes during the story. Create a separate copy-ready reference-sheet prompt for every important asset. Maintain the same design across all scenes. If an object breaks, becomes damaged, changes hands, or is modified during the story, document the change and create a separate state reference when necessary. **Beginner instruction:** Save the approved reference image for each important asset. Upload that image whenever generating a scene in which the asset must appear consistently. # STEP 7 — LOCATION & ENVIRONMENT REFERENCE SHEETS Identify every major location before generating the storyboard. Assign stable IDs such as LOC_01, LOC_02, and LOC_03. For every location, document: - Location name and story purpose. - Architecture, geography, and layout. - Interior or exterior classification. - Time of day and weather. - Main color palette. - Lighting direction and quality. - Important furniture, landmarks, doors, windows, and props. - Character entrances and exits. - Camera-friendly areas. - Environmental movement, such as rain, smoke, wind, or flowing water. - Scenes that use the location. Create a separate environment reference-image prompt for every major location. Where continuity requires it, include: - Wide establishing view. - Alternate camera-facing views. - Important architectural details. - Key prop placement. - Spatial relationships between entrances, exits, and landmarks. Do not change the layout of a location between shots without a story-based reason. If the same location appears at different times, preserve the underlying environment and change only justified elements such as lighting, weather, damage, or time of day. ### Deliverables For every location: 1. Environment description. 2. Reference-sheet prompt. 3. Lighting and color notes. 4. Important object positions. 5. Scenes using the location. 6. Continuity instructions. # STEP 8 — COSTUME, MAKEUP & CHARACTER STATE CONTINUITY Create a continuity record for every character across the entire story. Track: - Costume ID. - Clothing colors and materials. - Footwear and accessories. - Hair condition. - Makeup and facial details. - Injuries, dirt, blood, water, or damage where story-appropriate. - Emotional and physical condition. - Changes that occur during the story. - The first scene and last scene in which each state appears. For example, if a character's shirt becomes torn during a fight, the shirt must remain torn in subsequent shots until the story establishes a change. Create additional appearance references only when needed. Do not allow random costume changes, unexplained injuries, or inconsistent accessories. # STEP 9 — COMPLETE STORY STRUCTURE & SCENE BREAKDOWN Only after establishing the characters, assets, and locations should you finalize the production scene plan. Divide the original story into numbered scenes in chronological order. For every scene, provide: - Scene ID and title. - Narrative purpose. - Location ID. - Time of day. - Characters present. - Props and assets required. - Character states and costumes. - Opening situation. - Actions in chronological order. - Dialogue or voice-over. - Emotional progression. - Conflict or turning point. - Ending situation. - Approximate duration. - Transition to the next scene. Ensure that every important story event is represented. Do not add filler scenes merely to increase the film duration. Estimate scene duration based on the actual action, dialogue, and pacing. If the story is too long for a short film, recommend a realistic duration or propose a clearly labeled adaptation. # STEP 10 — SHOT-BY-SHOT CINEMATIC STORYBOARD Break every scene into individual numbered shots. Choose camera shots according to the story's needs, not by forcing every shot type into every scene. Possible shot types include: - Extreme wide shot. - Establishing shot. - Full-body shot. - Medium shot. - Medium close-up. - Close-up. - Extreme close-up. - Over-the-shoulder shot. - Point-of-view shot. - Low-angle shot. - High-angle shot. - Insert shot. - Tracking shot. - Reaction shot. - Two-shot for character interaction. For each shot, specify: 1. Shot ID and scene ID. 2. Narrative purpose. 3. Shot size. 4. Camera angle. 5. Camera movement. 6. Estimated duration. 7. Characters and asset IDs. 8. Starting composition. 9. Exact character positions. 10. Physical action in chronological order. 11. Facial expression and emotional intent. 12. Environment and lighting. 13. Screen direction and eyelines. 14. Continuity with the preceding shot. 15. Ending composition. 16. Transition into the next shot. Keep individual shots simple enough for reliable AI generation. Do not combine multiple unrelated actions into one short video prompt. For dialogue, plan appropriate speaking shots and reaction shots. For action scenes, prioritize clear geography, believable movement, and understandable cause-and-effect. For emotional scenes, prioritize facial expressions, body language, and purposeful camera framing. # STEP 11 — STORYBOARD IMAGE GENERATION PROMPTS Create a separate copy-ready image prompt for every storyboard shot. Each image prompt must specify: - Shot ID and scene ID. - Exact character reference images to use. - Exact location reference to use. - Required prop and asset references. - Character identity and costume lock. - Character position and pose. - The specific moment being depicted. - Facial expression and emotional state. - Shot size, camera angle, and composition. - Lighting, color palette, and atmosphere. - Foreground, middle ground, and background where relevant. - Depth of field and visual style. - Spatial and screen-direction continuity. - Aspect ratio. - Negative constraints for common visual errors. ### Storyboard Prompt Rules Every image must depict a specific moment from the actual story. Do not generate unrelated promotional images instead of story frames. Do not change character identities, costumes, props, or location layouts between shots. Do not ask an image model to render multiple story moments in one frame unless a contact sheet is specifically required. Generate individual frames separately whenever accurate composition or reference control matters. ### Required Output for Every Shot **SHOT_001 — Scene Name** - Story moment: - Image tool: - Character references to upload: - Environment reference to upload: - Prop references to upload: - Copy-ready image prompt: - Expected output: - File name: - Continuity check: Repeat for every shot. **Beginner instruction:** Generate the image, compare it with the approved references, and save the best version. Fix identity or composition problems before using the frame for video generation. # STEP 12 — STORYBOARD REVIEW & APPROVAL Before creating videos, review the complete storyboard. Check: - Story events appear in the correct order. - Character identity remains consistent. - Clothing and accessories match the continuity records. - Props are present when required. - Locations have consistent layouts. - Character positions and eyelines make sense. - Camera angles support the story. - Actions progress logically. - Emotional expressions fit each moment. - There are no missing story-critical shots. Identify problems and provide specific replacement prompts or corrections. Create a shot approval checklist. Do not silently move forward with major continuity errors. If the story is large, divide the storyboard into manageable scene batches. # STEP 13 — AI VIDEO GENERATION PROMPTS Convert every approved storyboard image into a corresponding video-generation prompt. Use the approved storyboard image as the starting-frame reference wherever the selected tool supports it. Each video prompt must include: 1. Shot ID. 2. Target duration. 3. Starting-frame reference. 4. Character identity-lock instructions. 5. Starting character positions. 6. Exact physical actions in chronological order. 7. Natural body mechanics and facial expressions. 8. Camera movement and direction. 9. Environmental motion. 10. Lighting and visual style. 11. Character and prop continuity. 12. Ending position or ending-frame description. 13. Negative constraints. ### Motion Design Rules Describe what moves, when it moves, and how the movement finishes. Prefer a small number of clear, physically plausible actions in each clip. Avoid: - Sudden identity changes. - Unexplained position changes. - Random camera movements. - Unintended costume changes. - Warped hands, faces, and bodies. - Objects appearing or disappearing. - Impossible interactions with props. - Unmotivated slow motion. - Unwanted cuts within a continuous shot. - Conflicting movement instructions. For dialogue shots, identify the speaker and specify appropriate mouth movement when supported by the tool. For action scenes, specify the direction of movement, interaction, reaction, and final position. For quiet scenes, use subtle movements such as breathing, blinking, fabric motion, or environmental changes only when appropriate. ### Tool-Specific Instructions Use the actual capabilities of the selected video tool. If the tool supports image references, start frames, end frames, character references, or motion controls, explain how to use them. Do not invent tool features or unsupported duration limits. If one shot is too complex or too long, split it into connected clips and explain how to preserve continuity. ### Required Output For every shot: - Video tool. - Input image to upload. - Additional references to upload. - Copy-ready video prompt. - Target duration. - Expected motion. - Ending-frame requirement. - Continuity notes. - Common errors to check. Keep video prompts separate from image prompts. # STEP 14 — SHOT-TO-SHOT CONTINUITY & TRANSITIONS Create a continuity map linking the end of each shot to the beginning of the next. For each connected pair, check: - Character positions. - Direction of movement. - Screen direction. - Costume and physical condition. - Prop placement and ownership. - Lighting and weather. - Camera orientation. - Eyelines and character interaction. - Beginning and ending poses. - Time progression. Specify whether the next shot should use: - A direct cut. - A reaction shot. - A match cut. - An establishing shot. - A motivated camera transition. - A time jump. - Another transition justified by the story. Do not force transitions where a clean cut works better. When connected motion is important, describe the ending state of the first clip and the starting state of the next clip. Use an end-frame reference or other continuity controls when supported by the chosen tool. # STEP 15 — DIALOGUE, VOICE-OVER & AUDIO PLAN Determine whether the story requires dialogue, narration, environmental sound, music, or silence. Create: ### A. Dialogue Script For every line, specify: - Scene and shot ID. - Character name. - Exact dialogue. - Intended emotion. - Delivery style. - Language and pronunciation notes. Preserve existing dialogue unless the story requires an explicitly approved revision. ### B. Voice Design For every speaking character, define: - General voice qualities. - Approximate vocal age. - Accent or language requirements. - Speaking pace. - Emotional range. - Consistency requirements. Avoid assigning inconsistent voices to the same character. ### C. Sound Effects Specify relevant sounds such as footsteps, doors, rain, vehicles, impacts, wind, or other story-based effects. Identify where each sound begins and ends. ### D. Music Plan Define the mood, intensity, and timing of music across the film. Specify where music should rise, fall, stop, or leave room for dialogue. Do not add dramatic music to every moment unnecessarily. ### E. Audio Production Instructions Recommend a suitable audio workflow and tool. Provide separate copy-ready prompts for audio generation when the chosen tool supports them. Explain how to synchronize dialogue, effects, and music during editing. # STEP 16 — MUSIC, COLOR GRADING & VISUAL MATCHING Establish a consistent visual identity for the film. Provide: - Master color palette. - Lighting style. - Contrast and saturation direction. - Skin-tone preservation guidelines. - Day and night scene differences. - Visual treatment for flashbacks or dream sequences. - Matching guidelines for AI-generated footage. - Recommended color-grading approach. Maintain the established visual style across all scenes. Do not force identical lighting onto scenes that intentionally have different times of day or emotional purposes. Provide practical color-grading instructions suitable for the selected editing software. # STEP 17 — FILM EDITING & POST-PRODUCTION Create a practical editing plan for assembling the generated material. Include: 1. Recommended project settings. 2. Timeline organization. 3. Scene and shot order. 4. Target duration for each shot. 5. Clip trimming and pacing. 6. Dialogue synchronization. 7. Voice-over placement. 8. Sound-effect placement. 9. Music placement and volume balance. 10. Transitions and cuts. 11. Color grading. 12. Captions and subtitles when required. 13. Opening title and end credits when appropriate. 14. Final quality-control review. 15. Export settings. Create a timeline table containing: - Timeline start. - Timeline end. - Scene ID. - Shot ID. - Clip duration. - Audio requirements. - Transition. - Notes. Keep all durations realistic and ensure the total timeline approximately matches the planned film duration. Recommend only the tools needed for the project. Do not require the user to purchase unnecessary software. # STEP 18 — PRODUCTION ASSET LIBRARY & FILE ORGANIZATION Provide a beginner-friendly folder structure. Use a structure similar to: AI_FILM_PROJECT/ 01_STORY_AND_SCRIPT/ 02_FILM_DIRECTION/ 03_CHARACTER_PORTRAITS/ 04_CHARACTER_REFERENCE_SHEETS/ 05_COSTUMES_AND_STATES/ 06_PROP_AND_VEHICLE_REFERENCES/ 07_ENVIRONMENT_REFERENCES/ 08_SCENE_BREAKDOWN/ 09_STORYBOARD_IMAGES/ 10_APPROVED_VIDEO_CLIPS/ 11_DIALOGUE_AND_VOICEOVER/ 12_SOUND_EFFECTS/ 13_MUSIC/ 14_EDITING_PROJECT/ 15_FINAL_EXPORTS/ Use stable names such as: CHAR_01_Portrait_v01.png CHAR_01_ReferenceSheet_v01.png LOC_01_Environment_v01.png PROP_01_Reference_v01.png SC01_SH001_Storyboard_v01.png SC01_SH001_Video_v01.mp4 Do not overwrite approved references without keeping a backup. Provide a master asset inventory that links each character, location, prop, image, video, and audio file to the scenes and shots that use it. # STEP 19 — PRODUCTION TRACKER & QUALITY CONTROL Create a shot-by-shot production tracker with these fields: - Scene ID. - Shot ID. - Shot description. - Character references ready. - Environment reference ready. - Prop references ready. - Image prompt ready. - Storyboard image generated. - Image approved. - Video prompt ready. - Video generated. - Video approved. - Dialogue and sound ready. - Editing complete. - Final quality check. - Outstanding problems. Use simple status labels: NOT STARTED / IN PROGRESS / NEEDS REVISION / APPROVED. Provide a final checklist covering: - Story accuracy. - Character consistency. - Asset continuity. - Image quality. - Motion quality. - Audio synchronization. - Scene transitions. - Visual matching. - Export quality. Do not mark an item approved unless it has actually been reviewed. # STEP 20 — BEGINNER EXECUTION GUIDE After preparing the production package, explain how to use it in simple language. For each stage, include: **WHAT TO DO:** The specific action the beginner should take. **TOOL TO USE:** The appropriate AI tool or editing software. **WHAT TO UPLOAD:** The exact reference image or file required. **PROMPT TO COPY:** The ready-to-use prompt. **EXPECTED RESULT:** What the tool should produce. **HOW TO CHECK IT:** The quality criteria to review. **SAVE AS:** The recommended file name. **NEXT STEP:** What to do after approval. Explain technical terms briefly when they first appear.
🔥 The Character Sheet Trick Most People Don’t Know
Give AI ANY reference image — a person, animal, creature, product, vehicle, object, or anything else…
Then use this prompt to turn it into a professional reference sheet with multiple views while keeping the same identity, shape, details, and appearance consistent.
One Reference Image → Complete Production Reference Sheet.
Save this prompt. You’ll use it again and again. 🚀
Prompt :
Create a professional reference sheet for the exact subject shown in the uploaded reference image, designed specifically for AI image and video production consistency.
REFERENCE IMAGE — IDENTITY LOCK
Use the uploaded reference image as the primary and authoritative visual reference.
Preserve the exact identity and visual characteristics of the reference subject. Do not redesign, reinterpret, replace, beautify, simplify, or alter the subject.
Maintain consistency in:
Exact identity and recognizable features
Shape and proportions
Structure and anatomy, where applicable
Face and facial proportions, where applicable
Body proportions, where applicable
Colors, textures, materials, and surface details
Hair, fur, skin, scales, or other physical characteristics, where applicable
Clothing, accessories, markings, patterns, logos, and distinctive details
Original design language and overall appearance
If the reference is an object, product, vehicle, creature, animal, character, or any non-human subject, adapt the sheet naturally to that subject while preserving its exact original design.
REFERENCE SHEET
Create a clean professional multi-panel reference sheet showing the same exact subject from multiple useful views.
Include:
Front View — clear primary view of the complete subject.
3/4 View — showing depth, structure, and dimensional form.
Side / Profile View — clear side view of the subject.
Back View — showing the rear structure and details.
Detailed Close-Up — close view of the most important identifying features or details.
Alternative Detail View — another useful angle or close-up that clearly helps maintain consistency.
For subjects where a particular view is not applicable, intelligently replace it with the most useful equivalent view while maintaining the same purpose of the reference sheet.
CONSISTENCY LOCK
The subject must be 100% recognizable as the exact same subject in every panel.
Do not change:
Identity
Proportions
Shape
Structure
Colors
Materials
Distinctive features
Clothing or accessories
Design details
No accidental variations between panels.
PRESENTATION
Arrange all views in a clean, professional reference-sheet layout with:
Plain white or neutral background
Clear separation between panels
Consistent scale where appropriate
Even spacing
Clean studio presentation
Sharp details
Accurate proportions
No unnecessary environment
No dramatic perspective distortion
The final result should look like a professional AI production reference sheet / turnaround sheet, suitable for maintaining subject consistency across future image and video generations.
IMPORTANT
Do not add any new design elements that are not present in the reference image.
REFERENCE FIRST — CONSISTENCY ALWAYS.
The uploaded reference image has priority over assumptions or creative interpretation.
After gotten the two Character Sheets, I then generated the Location + Props and Recurring Objects Sheet.
Below is the Character Sheet prompt:
""
Create a professional character turnaround reference sheet for the same single character, designed for AI image/video production consistency. Show the character in these six clearly separated views on one clean white background: full-body front view, full-body front-facing neutral pose, full-body 3/4/profile view, full-body back view, detailed front facial close-up, and detailed side-profile facial close-up. Keep the exact same character identity, face, facial proportions, hairstyle, body proportions, skin appearance, clothing, accessories, and overall appearance consistent across every view. Arrange all views cleanly with enough spacing between them. No text overlay.
Created with @ChatGPT
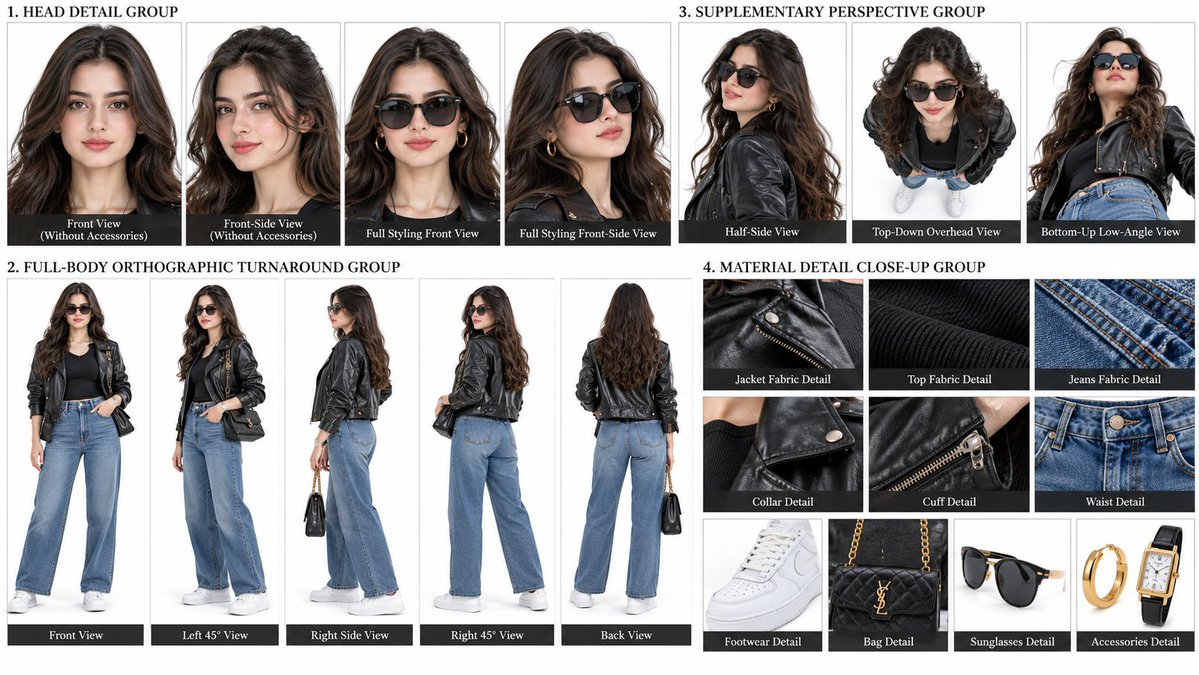
Prompt :
Please generate a high-quality, photorealistic character reference sheet for a character design.
Character: {{Character Name}}
Character Identity: {{Basic Character Identity}}
Character Description: {{Character Description}}
Clothing Design: {{Clothing Description}}
Accessories Design: {{Accessories Description}}
Footwear Design: {{Footwear Description}}
Hairstyle Design: {{Hairstyle Description}}
If reference images are provided:
- Use the reference images solely as the primary basis for the character's facial features, skeletal structure, skin texture, and hairstyle
- Maintain consistency in age, race, and gender characteristics
- Ensure facial features highly match the reference images
Output Requirements:
- Pure white background
- 16:9 landscape orientation
- 4K resolution
- Clear and standardized layout
- No overlapping or cropping of any modules
- High-precision details in a professional cinematic character card style
Must Include the Following Modules:
1. Head Detail Group:
- Front view without accessories
- Front-side view without accessories
- Full styling front view
- Full styling front-side view
2. Full-Body Orthographic Turnaround Group:
- Front
- Left 45 degrees
- Right side
- Right 45 degrees
- Back
3. Supplementary Perspective Group:
- Half-side view
- Top-down overhead view
- Bottom-up low-angle view
4. Material Detail Close-Up Group:
- Clothing fabric close-up
- Cuff / Collar / Waist details
- Footwear details
- Accessories details
Consistency Requirements:
All modules must depict the exact same character, with identical facial features, hairstyle, skin tone, body proportions, clothing, footwear, accessories, lighting, and materials. No character drift or view discrepancies are allowed.
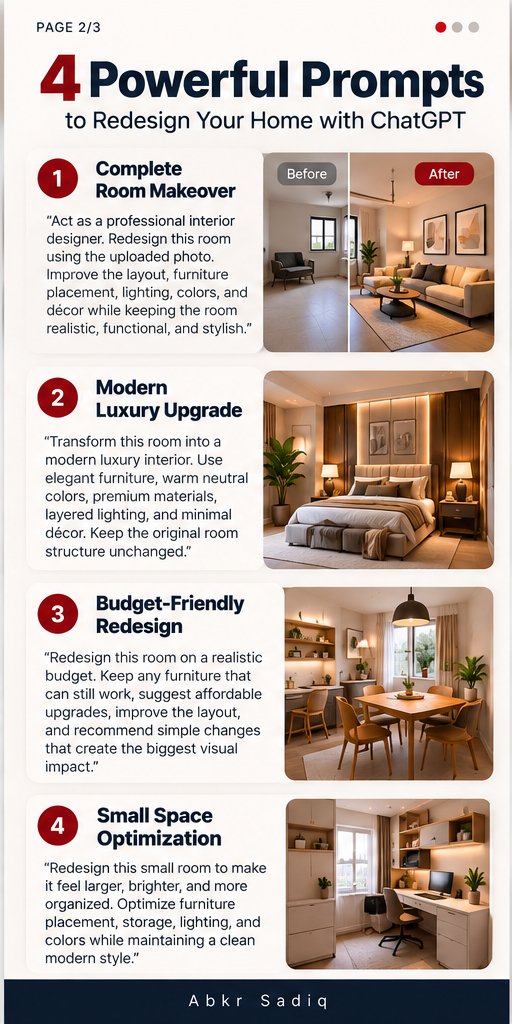
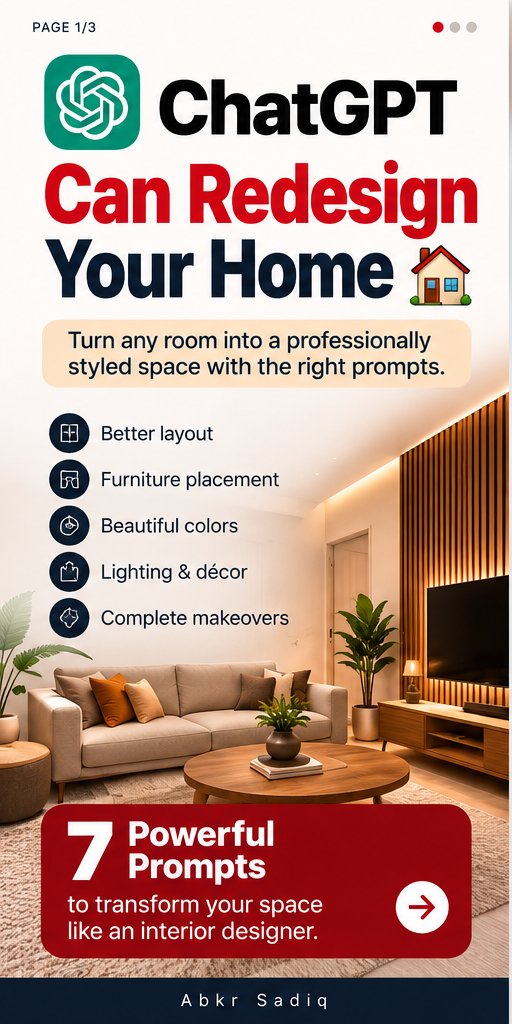
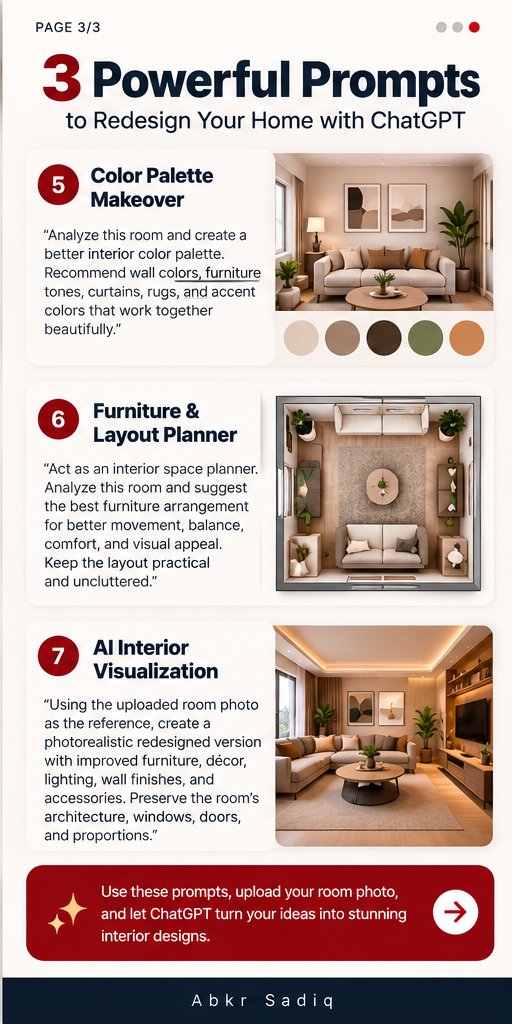
Breaking: ChatGPT Can now Redesign Your Home like a professional interior designer.
Turn any room into a professionally styled space with the right prompts.
From layout and furniture placement to colors, lighting, décor, and complete room makeovers, ChatGPT can help you plan your dream interior.
Here are 7 powerful prompts to transform your space like an interior designer 👇
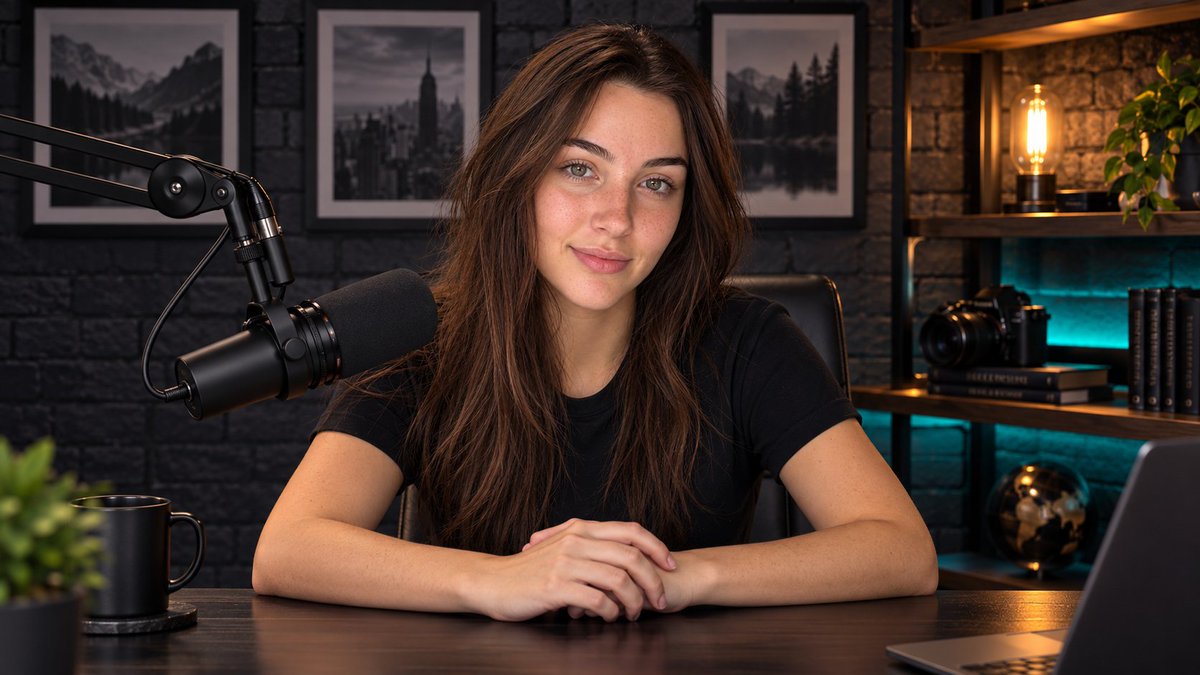
Want to create a portrait like this?
Just copy the prompt, upload your reference image, and let the AI transform it into a polished, professional portrait while preserving your identity and key facial features.
Created with @Chatgpt
Prompt :
UNIVERSAL MASTER PROMPT — CINEMATIC PODCAST HOST
REFERENCE PERSON → SEATED STUDIO HOST
REFERENCE / IDENTITY LOCK:
Use the uploaded reference image as the ONLY identity reference for the person.
Preserve the person's identity with maximum accuracy:
- exact facial identity
- face shape and proportions
- eyes, eyebrows, nose, lips and jawline
- natural skin tone
- hairstyle and hairline
- age and gender presentation
- distinctive facial features
- natural body proportions
DO NOT beautify, redesign, masculinize, feminize, age, de-age, or alter the person's identity.
The person in the final image MUST clearly remain the same individual from the reference image.
SUBJECT TRANSFORMATION:
Place the reference person as a professional podcast/video host seated directly in front of the camera.
The person is sitting behind a dark premium studio desk, facing the camera straight-on in a natural centered position.
Upper body and arms are clearly visible.
The person is seated comfortably with both forearms resting naturally on the desk and hands positioned together in front of the body.
Expression is calm, confident, intelligent, approachable and professional.
Natural relaxed posture. Direct eye contact with the camera.
OUTFIT:
Keep the person's natural appearance and adapt the clothing into a simple premium dark/black casual-professional outfit, such as a plain black crew-neck T-shirt.
No logos, no text, no distracting patterns.
ENVIRONMENT:
Create a premium cinematic podcast studio.
Dark black/charcoal exposed brick wall in the background.
A large professional black podcast microphone is positioned in the foreground on the LEFT side of the frame, mounted on a black articulated boom arm extending into the shot.
The microphone should be close to the host but must NOT cover the face.
Behind the host on the RIGHT side:
- dark wooden studio shelving/desk
- a professional camera
- stacked dark books
- a warm glowing vintage Edison-style lamp
- subtle cyan/teal LED accent lighting underneath the shelf
Three dark framed minimalist photographs/artworks are mounted on the background wall.
The studio should feel expensive, modern, cinematic and professionally produced.
COMPOSITION:
16:9 widescreen composition.
Camera positioned directly in front of the seated person at approximately eye level.
Medium-wide / medium shot showing:
- entire head
- shoulders
- torso
- both arms
- hands
- substantial portion of the desk
Person positioned approximately center-right of the frame, leaving intentional negative space on the LEFT side around the microphone.
The microphone boom arm enters from the far LEFT edge and angles naturally toward the host.
IMPORTANT SPATIAL LOCK:
The host MUST remain directly in front of the camera.
The host MUST NOT be positioned sideways.
The host MUST NOT be looking away from the camera.
The microphone MUST remain on the LEFT side of the image.
The camera, boom arm and microphone must NOT switch sides.
Do not place any additional microphone, person, chair, doorway, window, gate, or unrelated object in the scene.
CAMERA / LENS:
Professional full-frame cinema camera.
Approximately 50mm lens.
Eye-level camera height.
Natural perspective.
Moderate depth of field.
Host's face extremely sharp.
Background softly separated but still recognizable.
LIGHTING:
Premium cinematic studio lighting.
Soft warm key light illuminating the person's face from the front-left.
Subtle controlled fill light.
Warm practical light from the Edison lamp in the background.
Very subtle cyan/teal practical accent light underneath the shelf.
Deep shadows and controlled contrast.
Natural skin highlights.
Realistic skin texture.
No plastic skin.
VISUAL STYLE:
Ultra-realistic professional podcast photography.
High-end cinematic commercial production.
Netflix-style premium color grading.
Photorealistic materials and lighting.
Natural human anatomy.
Realistic hands and fingers.
Realistic facial details.
Physically accurate shadows and reflections.
Subtle natural depth of field.
REFERENCE IMAGE PRIORITY:
Identity accuracy is the highest priority.
The person's face must remain faithful to the uploaded reference.
Do not copy the reference background.
Only use the person's identity, facial features, hairstyle and natural physical characteristics from the reference.
NEGATIVE CONSTRAINTS:
No identity drift.
No face swapping artifacts.
No different person.
No altered facial structure.
No exaggerated beauty enhancement.
No distorted hands.
No extra fingers.
No missing fingers.
No duplicate limbs.
No asymmetrical eyes.
No deformed face.
No cartoon appearance.
No CGI appearance.
No artificial skin.
No excessive sharpening.
No text.
No logos.
No watermark.
No additional people.
No second microphone.
No microphone on the RIGHT.
No camera covering the host's face.
No sideways pose.
No profile view.
No looking away.
No unnecessary objects.
No doorway.
No window.
No exterior scene.
FINAL OUTPUT:
Create a single highly realistic cinematic photograph of the exact reference person seated as a professional podcast host in the described studio, looking directly into the camera, with the black microphone and boom arm clearly positioned on the LEFT side of the frame.
RESOLUTION LOCK:
Generate the final image in 16K resolution — 15360 × 8640 pixels, 16:9 aspect ratio.
Created with @GeminiApp
Prompt :
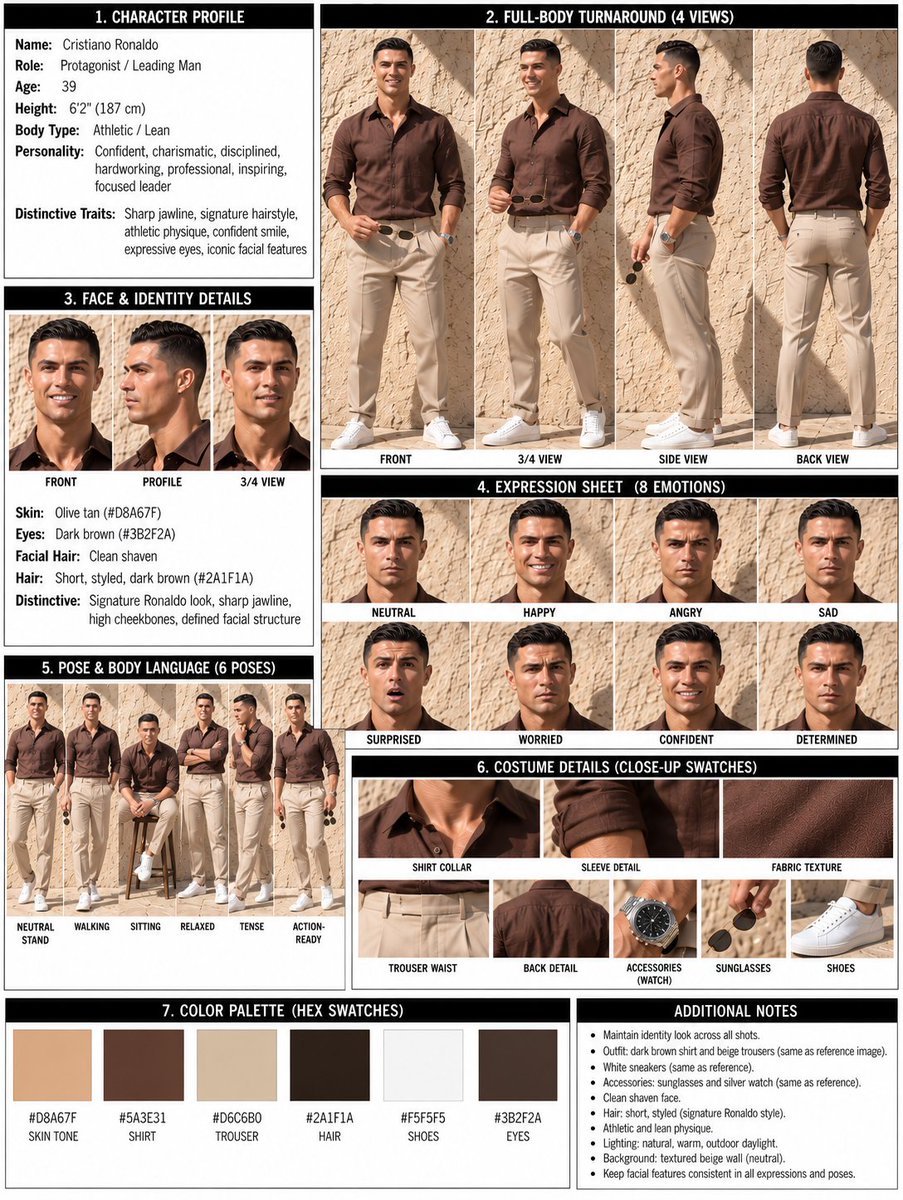
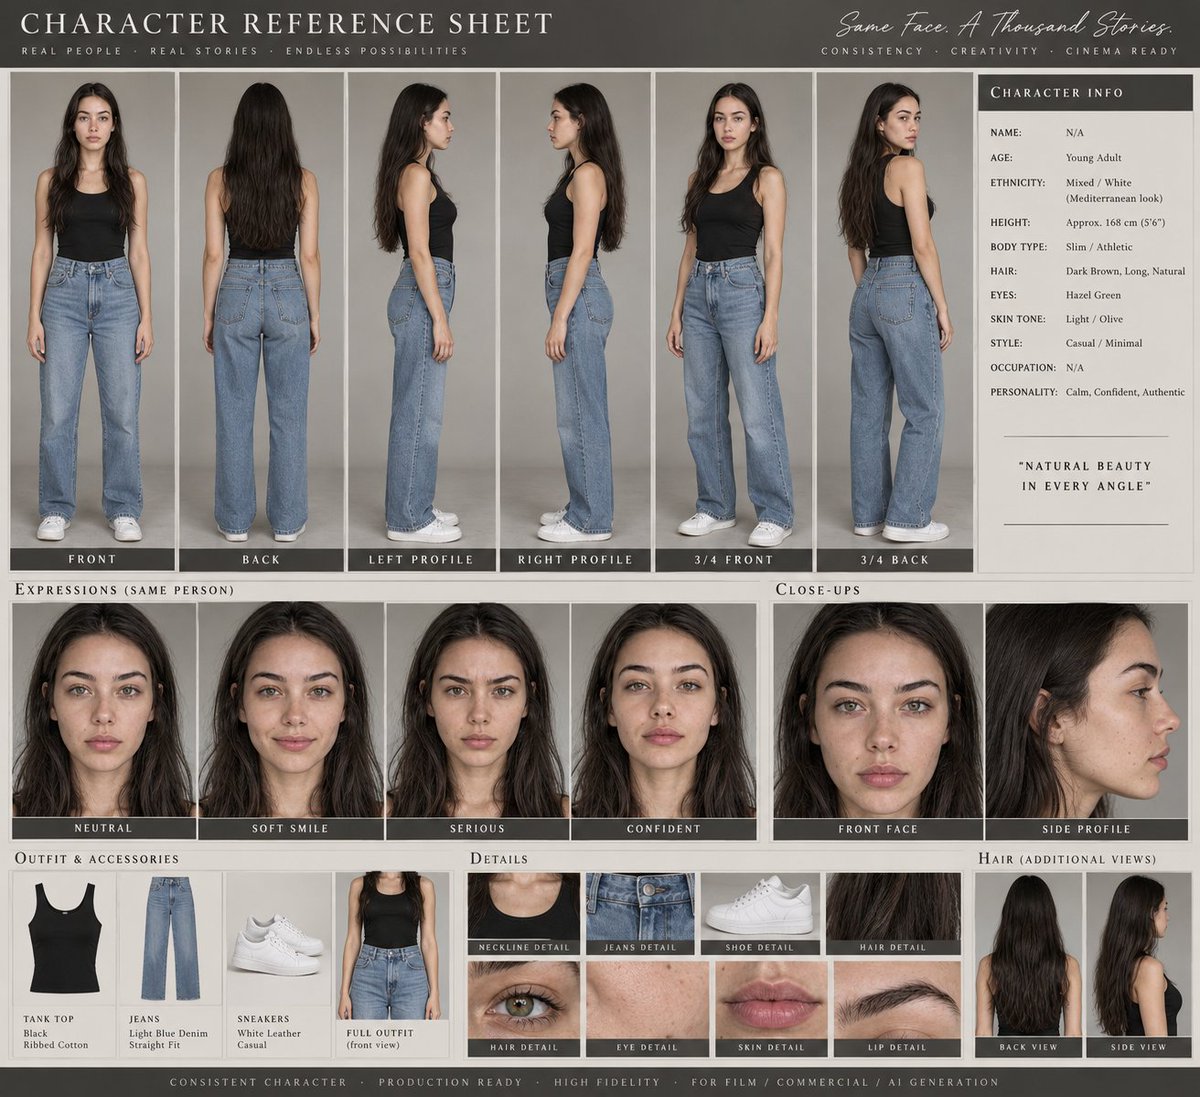
Create a **premium professional AI CHARACTER REFERENCE SHEET** using the provided reference image as the **PRIMARY and STRICT identity reference**.
The character must remain **100% visually consistent with the reference** across every panel. Do not redesign, beautify, age, or alter the character's identity.
### CHARACTER IDENTITY LOCK
Preserve exactly:
- facial structure and proportions
- face shape
- eyes, eye shape and eye color
- eyebrows
- nose structure
- lips and mouth shape
- jawline and cheekbones
- skin tone and natural skin texture
- hairstyle, hair color, length and texture
- recognizable facial features
- overall body proportions and silhouette
### CHARACTER VIEWS
Show the same character in a clean professional character-sheet layout with:
1. Full-body FRONT view
2. Full-body BACK view
3. LEFT SIDE profile
4. RIGHT SIDE profile
5. 3/4 FRONT view
6. 3/4 BACK view
7. Close-up FRONT face
8. Close-up SIDE profile
9. Neutral expression
10. Soft smile
11. Serious expression
12. Confident expression
Every panel must depict **the exact same person**, with identical facial identity, hairstyle, proportions and styling.
### OUTFIT & STYLING
Clearly document the character's complete outfit:
- clothing
- colors
- fabric/material
- shoes
- accessories
- jewelry
- hairstyle
- makeup/grooming
Include small **detail callout panels** for important clothing, accessories, hairstyle and facial details.
### PRESENTATION
Design the sheet like a **professional film/advertising character bible**.
Clean studio background, elegant editorial layout, evenly spaced panels, consistent neutral studio lighting, sharp details, realistic skin, premium fashion photography quality.
Add subtle professional labels such as:
**FRONT • BACK • PROFILE • 3/4 • EXPRESSION • OUTFIT • DETAILS**
Use a sophisticated cinematic presentation with excellent visual hierarchy.
### CONSISTENCY RULE
The reference image is the **single source of truth**.
Do NOT change:
- identity
- facial features
- hairstyle
- skin tone
- body proportions
- outfit design
- accessories
No random variations, no different faces, no duplicate-looking characters, no distorted anatomy, no extra fingers, no inconsistent clothing.
The final result should look like an **official production-ready character reference sheet created for a high-budget cinematic commercial**, suitable for maintaining character consistency across AI-generated images and videos.
Character reference sheet for consistent AI generation — multiple angles, outfit details, hair, face, hands, and accessories in one visual guide.
Created with @magnific
prompt ;
Create a highly detailed, professional CHARACTER DEVELOPMENT / CHARACTER REFERENCE SHEET using the uploaded reference image as the ONLY source for the subject's identity.
IMPORTANT IDENTITY PRESERVATION RULE:
Use the uploaded reference image strictly for the subject's true identity. Preserve the exact recognizable facial identity, facial structure, proportions, eyes, eyebrows, nose, lips, cheeks, jawline, chin, forehead, skin characteristics, natural asymmetry, hairline and all distinctive facial features.
Do NOT beautify, idealize, stylize, redesign, or replace the person's face.
Do NOT change the person's ethnicity, age appearance, gender presentation, facial proportions, or recognizable identity.
Do NOT create a lookalike or a generic model.
The subject must remain clearly recognizable as the same person throughout every panel.
If the reference image is male, keep the subject male.
If the reference image is female, keep the subject female.
Follow the natural appearance of the reference image exactly.
Create ONE clean professional character reference sheet / model sheet containing multiple views and detailed visual references of the SAME PERSON.
OVERALL STYLE:
Professional film/animation character-development reference board.
Photorealistic studio photography.
High-end fashion/editorial photography quality.
Neutral studio background.
Clean controlled studio lighting.
Realistic skin texture.
Natural pores and subtle facial imperfections.
Accurate anatomy.
Consistent proportions.
No fantasy styling.
No cartoon or illustration appearance.
No excessive retouching.
No beauty-filter effect.
SHEET COMPOSITION:
Organize the final image into a clean professional multi-panel reference sheet similar to a production character sheet.
SECTION 1 — FULL BODY VIEWS:
Include:
1. Full-body FRONT view — standing naturally, facing directly toward camera.
2. Full-body SIDE PROFILE view — true 90-degree side profile.
3. Full-body BACK view — facing completely away from camera.
4. Optional 3/4 full-body view if space allows.
Keep the exact same person, same body proportions, same hairstyle, same facial identity, same clothing and same physical characteristics across all views.
The full-body poses should be neutral and relaxed:
- arms naturally positioned
- feet naturally aligned
- upright posture
- no exaggerated pose
- no action pose
SECTION 2 — HEAD / FACE ANGLES:
Create detailed head-and-shoulders portraits showing the same person's face from multiple angles:
1. Straight FRONT portrait
2. 3/4 LEFT view
3. TRUE LEFT PROFILE
4. 3/4 RIGHT view
5. TRUE RIGHT PROFILE
6. Slight HIGH ANGLE looking downward
7. Slight LOW ANGLE looking upward
8. BACK OF HEAD / HAIR view if useful
Every face angle must maintain EXACT facial identity and consistent anatomy.
The eyes, nose, lips, jawline, cheekbones, eyebrows, ears, hairline and facial proportions must remain consistent between every portrait.
SECTION 3 — BACK / HAIR REFERENCE:
Include a clear rear view of the head and hair showing:
- hairstyle
- hair length
- hair density
- natural hair texture
- hairline
- back-of-head shape
Do not invent a different hairstyle unless it is necessary to accurately represent what is visible in the reference.
SECTION 4 — CLOTHING / OUTFIT REFERENCE:
Show detailed close-up crops of the clothing and accessories.
Include useful detail panels such as:
- fabric texture
- seams
- stitching
- folds
- waistband
- collar
- sleeves
- buttons/zippers
- shoes
- jewelry/accessories if present
Keep the exact same outfit across all views.
SECTION 5 — SKIN / FACIAL DETAIL:
Include several macro-detail crops where appropriate:
- realistic skin texture / pores
- eye detail
- eyebrow detail
- lips
- distinctive facial features
- any visible freckles, moles, scars, marks or natural skin characteristics
These details must come directly from the reference subject and must NOT be artificially invented.
SECTION 6 — HANDS / SHOES / ACCESSORIES:
If visible and relevant, include clean close-up reference crops of:
- hands
- fingers
- shoes
- jewelry
- glasses
- watches
- bags
- other distinctive accessories
Keep all details consistent with the main character.
CONSISTENCY RULE:
ALL PANELS MUST REPRESENT THE EXACT SAME PERSON.
Maintain absolute consistency in:
- facial identity
- facial geometry
- body proportions
- height/build
- hairstyle
- hair color
- skin tone
- eye color
- eyebrows
- clothing
- accessories
- shoes
- age appearance
Do not allow individual panels to drift into different faces or different body types.
CAMERA / PHOTOGRAPHY:
Professional studio photography.
Full-frame camera look.
Natural perspective.
Approximately 50–85mm equivalent portrait perspective for face shots.
Natural perspective for full-body shots.
Sharp facial detail.
High dynamic range.
Soft, controlled studio illumination.
Subtle realistic shadows.
Neutral white/gray studio background.
Consistent lighting direction across the sheet.
LAYOUT:
Create a polished editorial contact-sheet layout with clearly separated rectangular panels.
Use small professional section labels such as:
FULL BODY VIEWS
HEAD ANGLES
BACK / HAIR
DETAILS
FACE
CLOTHING
SHOES
Use thin clean dividers between panels.
Balanced spacing.
Professional production-design presentation.
Minimal typography.
No decorative graphics that distract from the character.
IMPORTANT:
The reference image is the identity anchor.
Do NOT copy the exact composition of the reference image if it conflicts with the uploaded subject.
Instead, reproduce the REFERENCE SHEET FORMAT, organization, panel logic, photography style and level of detail while replacing the example subject with the person from the uploaded reference.
The final result should look like a professionally photographed CHARACTER REFERENCE / MODEL SHEET created for a film, animation, VFX, game, fashion or AI character-production pipeline.
ULTRA-REALISM REQUIREMENTS:
Photorealistic human.
Natural skin pores.
Individual hair strands.
Realistic eyes with natural reflections.
Realistic fabric behavior.
Physically accurate anatomy.
Natural hands and fingers.
Correct facial symmetry/asymmetry.
No plastic skin.
No CGI appearance.
No artificial beauty filter.
No warped anatomy.
No duplicated features.
No inconsistent face between panels.
No extra fingers.
No distorted hands.
No floating objects.
No text artifacts.
No random logos.
No watermark.
FINAL PRIORITY:
1. EXACT IDENTITY PRESERVATION
2. CONSISTENT CHARACTER ACROSS ALL PANELS
3. ACCURATE ANATOMY AND PROPORTIONS
4. PHOTOREALISTIC QUALITY
5. PROFESSIONAL REFERENCE-SHEET LAYOUT
6. HIGH-DETAIL VISUAL REFERENCES
Use the uploaded image as the sole identity reference and generate the complete professional character reference sheet.