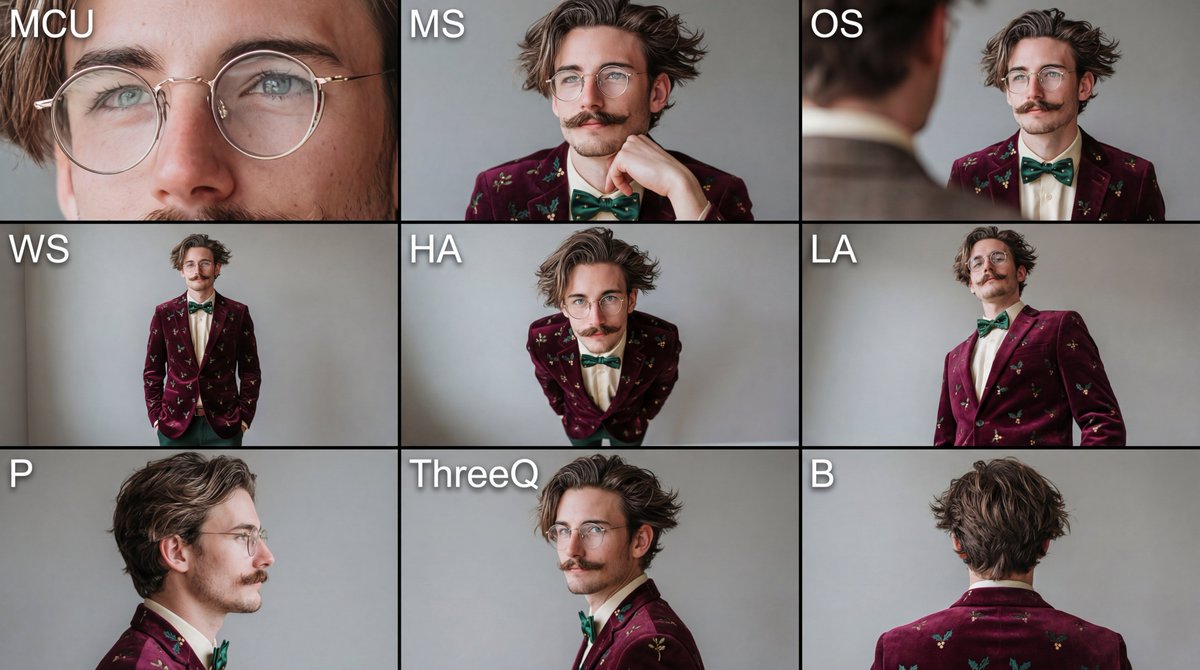
camera shot and angle reference chart for your subject with nbp
MCU = Macro Close Up
MS = Medium Shot
OS = Over the Shoulder
WS = Wide Shot
HA = High Angle
LA = Low Angle
P = Profile
ThreeQ = Three-Quarter View
B = Back View
prompt (+ ref image):
{ "project_name": "Auto_Cinematic_9_Angle_Grid_Generator", "version": "3.0 (Angle & Anatomy Focus)", "instructions_for_ai": { "step_1_analysis": "Analyze the input image for subject identity, lighting (e.g., prism effects, direction), skin texture, emotion, and color palette.", "step_2_inference": "If the input is a close-up, you must logically infer the subject's outfit, body type, and environment based on the style of the face. Maintain strictly consistent character design across all 9 panels.", "step_3_execution": "Generate a 3x3 grid where each panel corresponds to the specific camera definitions below." }, "camera_angle_specifications": { "MCU": "Macro Close Up: Focus intensely on facial details, eyes, or textures. Crop top of head and chin.", "MS": "Medium Shot: Waist or chest up. Standard cinematic portrait framing.", "OS": "Over the Shoulder: Camera placed behind a vague foreground element/shoulder, looking at the subject.", "WS": "Wide Shot: Full body shot. Show the subject's posture, outfit, and relationship with the environment.", "HA": "High Angle: Camera is physically higher than the subject, looking down. Emphasize vulnerability or diminishing size.", "LA": "Low Angle: Camera is physically lower than the subject, looking up. Emphasize dominance or stature.", "P": "Profile: Strictly from the side (90 degrees). Subject looks completely left or right.", "ThreeQ": "3/4 View: Subject turned 45 degrees away from the camera. Classic portrait angle.", "B": "Back View: Camera is directly behind the subject. Seeing the back of the head/body." }, "output_format": { "grid_layout": "3x3", "aspect_ratio": "16:9", "labeling": "Must include white text abbreviations (MCU, MS, etc.) in the top-left corner of each panel." }, "final_prompt_instruction": "Using the provided input image as the absolute ground truth for the character and style, generate a photorealistic 3x3 grid collage. You must strictly adhere to the 'camera_angle_specifications' defined above for each panel. Ensure distinct visual variety between the shots (e.g., a Wide Shot must look significantly different from a Close Up). The lighting and color grading must remain identical to the input source in every single angle.\n\nGrid Order:\nRow 1: MCU, MS, OS\nRow 2: WS, HA, LA\nRow 3: P, ThreeQ, B" }
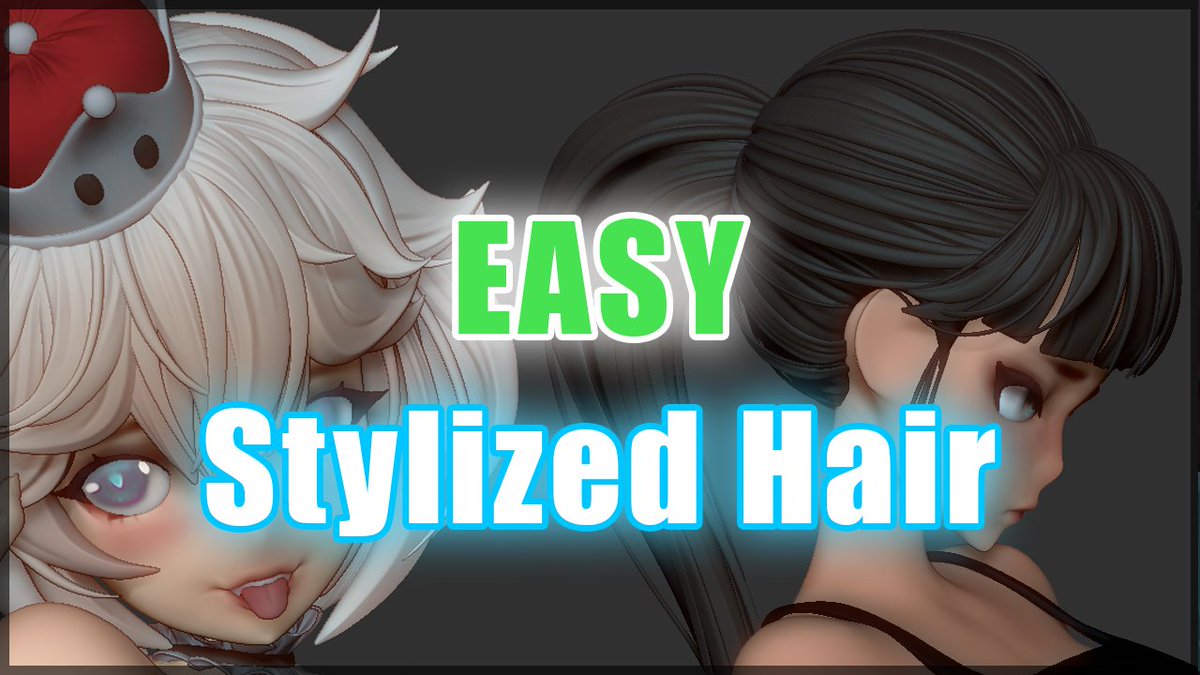
My Hair Tutorial is FINALLY done and uploaded along with the sample scene shown and 🌟FREE🌟 on my gumroad! Link to both the available content is in the thread below 🧵⬇️⬇️⬇️ Thanks for all your patience and Happy Thanksgiving!
After some research, the best method I found to get the mouth moving as one would expect, was one I learnt from @hjalti, where you parent your MCH tweak bones to a bone with a stretch-to constraint, this serves as an anchor for even distribution
Here's another feature coming to the @getfondant Blender Custom Normals addon: Flood/Fill. Laplacian Smoothing is basically a fancy form of averaging. So the value on each corner is a mix of its current value and those of its neighbors (per iteration.) That means you sometimes have some areas you don't want to contribute at all, or to just be filled in with the general shape of the rest of the mesh.
Here's an example on a belt that has some flat, lower poly faces on the interior. Without smoothing they make a visible ledge. Those faces spread their influence over the whole mesh and it smooths out to something more like a cylinder. But with the new Flood Area, they get ignored! Their original Normal gets weakened when averaging with their neighbors.
Here it is set to 0, which totally throws out their original Normal and lets them get filled in with a new one from their neighbors.
Hey animators, here I bring you a powerful node for Unreal Engine users. If you try it I would love to see your results...👀
#tutorial#UnrealEngine#gamedevs#animation
🔮 Create stunning, realistic, stylized or anime eyes in seconds with EyeForge – the ultimate customizable eye generator for Blender artists who want total control without the hassle. https://t.co/xQcD6KNLBK
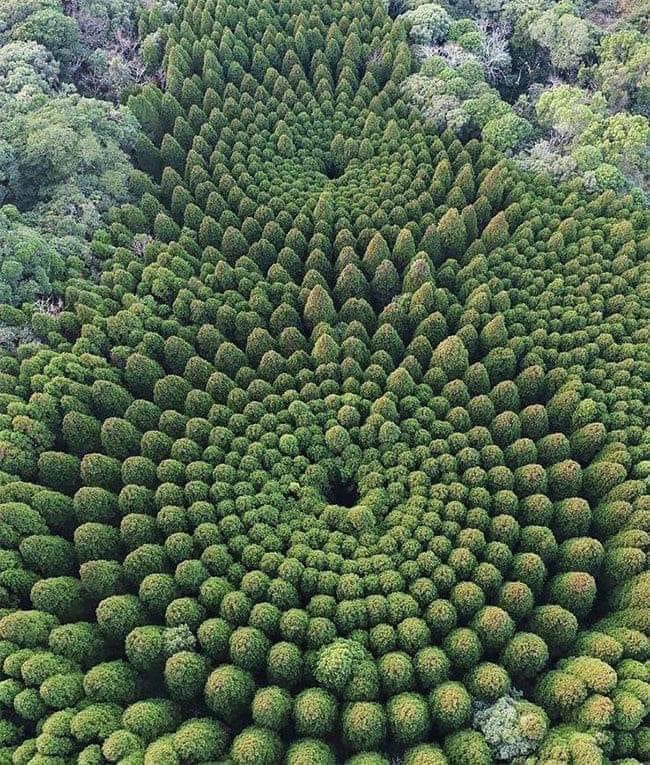
Cette image n’a pas été générée par l’IA, mais résulte d’une expérience scientifique lancée en 1973.
Dans la préfecture de Miyazaki, au sud du Japon, une forêt circulaire parfaitement dessinée intrigue ceux qui la découvrent depuis le ciel.
Il s’agit du fruit d’un projet mené par le ministère japonais de l’Agriculture, des Forêts et des Pêches. L’objectif était d'étudier comment la densité de plantation influence la croissance des arbres.
Pour cela, les chercheurs ont planté 36 cèdres japonais (sugi) selon un schéma rigoureusement calculé : 10 cercles concentriques, croisés par des lignes radiales espacées de 10 degrés.
Cette disposition géométrique a permis de tester différentes densités — de 377 à plus de 10 000 arbres par hectare — sur un même terrain. Ce qui ne devait être qu’une expérience de cinq ans est finalement resté en place, et cinquante ans plus tard, la nature a transformé ce dispositif en œuvre visuelle.
La forêt a même pris une forme convexe, comme si elle épousait les courbes d’un dôme invisible, révélant les effets subtils de l’espacement sur la croissance.
Aujourd’hui visible depuis Google Earth (coordonnées : 31°43′50″N, 131°23′05″E), cette forêt circulaire est un exemple concret de la manière dont une simple expérimentation scientifique peut aboutir à un résultat visuel étonnant.
Source : https://t.co/zszHpYzXlD
The @getfondant Custom Normals Blender addon is being tested, and we're aiming for a 1.0 release next week! The first feature is the Weighted Normals + Laplacian Smoothing Geometry Nodes modifier. This let's you calculate Normals that are as clean as a nice quad mesh even if your topology is a mess and triangulated!
We'll be following up with more tools to support creating high quality Normals for 3D anime and vtuber characters. We have an optimized adjustable Face Normal Transfer proxy mesh nearly ready to go.
Check out the Docs to see more about the Addon's features and workflow (link in the reply.)